


Mantenere i propri server aggiornati è una delle pratiche fondamentali per garantire sicurezza e stabilità in qualsiasi infrastruttura, che si tratti di un homelab casalingo o di un ambiente di produzione.
Sapere in tempo reale quali pacchetti necessitano di aggiornamento, quali patch di sicurezza sono disponibili e avere una visione centralizzata dello stato dei propri sistemi Linux è qualcosa che, fino a poco tempo fa, richiedeva script personalizzati o soluzioni enterprise costose.
PatchMon v2 si propone come una soluzione open source elegante e leggera per il monitoraggio degli aggiornamenti su sistemi Debian/Ubuntu, offrendo una dashboard web intuitiva, notifiche configurabili e un’API REST che si integra facilmente con i principali strumenti di automazione e orchestrazione.
In questa guida vedremo come installare e configurare PatchMon v2 da zero su Ubuntu Server 26.04 LTS, la nuova release a supporto prolungato che introduce diverse ottimizzazioni lato sicurezza e gestione dei pacchetti. Partiremo dai prerequisiti di sistema, passeremo attraverso l’installazione del servizio e la sua configurazione base, fino ad avere un’istanza perfettamente funzionante e pronta all’uso.
Che tu stia gestendo un singolo server o una piccola flotta di macchine, al termine di questa guida avrai un sistema di monitoraggio delle patch affidabile, sempre sotto controllo.
PREREQUISITI
Ubuntu Server 26.04 LTS (Resolute Raccoon)
Architettura amd64/arm64
Utente con privilegi sudo o root
AGGIORNAMENTO DEL SISTEMA
Aggiornare il sistema con il comando:
|
0 |
sudo apt update && sudo apt upgrade -y
|
RIMOZIONE DEI PACCHETTI DOCKER CONFLITTUALI
Prima di installare Docker Engine, devi rimuovere eventuali pacchetti non ufficiali che potrebbero creare conflitti: Docker
|
0 |
sudo apt remove docker.io docker-compose docker-compose-v2 docker-doc podman-docker containerd runc -y
|
Non preoccuparti se alcuni pacchetti non risultano installati è normale.
INSTALLAZIONE DOCKER CE DAL REPOSITORY UFFICIALE
Per avere sempre le ultime patch di sicurezza, aggiungi il repository ufficiale Docker alle sorgenti APT: iRexta
Installare i prerequisiti con il comando:
|
0 |
sudo apt install ca-certificates curl -y
|
Aggiungere la GPG key ufficiale di Docker con i comandi:
|
0
1
2
3
4
|
sudo install -m 0755 -d /etc/apt/keyrings
sudo curl -fsSL https://download.docker.com/linux/ubuntu/gpg -o /etc/apt/keyrings/docker.asc
sudo chmod a+r /etc/apt/keyrings/docker.asc
|
Aggiungere il repository (usa automaticamente il codename “resolute”) con il comando:
|
0
1
2
3
|
echo \
"deb [arch=$(dpkg --print-architecture) signed-by=/etc/apt/keyrings/docker.asc] https://download.docker.com/linux/ubuntu \
$(. /etc/os-release && echo "$VERSION_CODENAME") stable" | \
sudo tee /etc/apt/sources.list.d/docker.list > /dev/null
|
Aggiornare l’indice e installare Docker con i comandi:
|
0
1
2
|
sudo apt update
sudo apt install docker-ce docker-ce-cli containerd.io docker-buildx-plugin docker-compose-plugin -y
|
VERIFICARE DOCKER E ABILITARE L’AVVIO AUTOMATICO
Verificare e abilitare Docker con i seguenti comandi:
|
0
1
2
|
sudo systemctl enable --now docker
sudo systemctl status docker
|
Dovremmo vedere Active: active (running).
AGGIUNGERE IL TUO UTENTE AL GRUPPO DOCKER (OPZIONALE MA CONSIGLIATO)
Per eseguire i comandi Docker senza sudo aggiungere il tuo utente al gruppo docker con i seguenti comandi:
|
0
1
2
|
sudo usermod -aG docker $USER
newgrp docker
|
⚠️ ATTENZIONE: questo equivale a privilegi root sull’host. Fallo solo con utenti fidati.
VERIFICA DEL DOCKER
Per verificare che Docker funzioni esseguire il comando:
|
0 |
docker run hello-world
|
Dovremmo visualizzare il seguente output:
|
0
1
2
3
4
5
6
7
8
9
10
11
12
13
14
15
16
17
18
19
20
21
22
23
24
25
26
|
Unable to find image 'hello-world:latest' locally
latest: Pulling from library/hello-world
4f55086f7dd0: Pull complete
d5e71e642bf5: Download complete
Digest: sha256:f9078146db2e05e794366b1bfe584a14ea6317f44027d10ef7dad65279026885
Status: Downloaded newer image for hello-world:latest
Hello from Docker!
This message shows that your installation appears to be working correctly.
To generate this message, Docker took the following steps:
1. The Docker client contacted the Docker daemon.
2. The Docker daemon pulled the "hello-world" image from the Docker Hub.
(amd64)
3. The Docker daemon created a new container from that image which runs the
executable that produces the output you are currently reading.
4. The Docker daemon streamed that output to the Docker client, which sent it
to your terminal.
To try something more ambitious, you can run an Ubuntu container with:
$ docker run -it ubuntu bash
Share images, automate workflows, and more with a free Docker ID:
https://hub.docker.com/
For more examples and ideas, visit:
https://docs.docker.com/get-started/
|
Quindi verificare la versione di Docker Compose installata con il comando:
|
0 |
docker compose version
|
Dovremmo visualizzare il seguente output:
|
0 |
Docker Compose version v5.1.3
|
INSTALLAZIONE DI PATCHMON V2
Eseguire lo script di setup da una directory vuota.
Scaricherà automaticamente docker-compose.yml e env.example, genererà tutti i secret necessari e ti guiderà nella configurazione dell’URL e del fuso orario in modo interattivo.
Eseguire i comandi:
|
0
1
2
|
mkdir ~/patchmon && cd ~/patchmon
bash -c "$(curl -fsSL https://raw.githubusercontent.com/PatchMon/PatchMon/refs/heads/main/docker/setup-env.sh)"
|
Lo script chiederà le seguenti cose:
|
0
1
2
3
4
5
6
7
8
9
10
|
Will you be accessing PatchMon via a reverse proxy (nginx, Caddy, etc.)? (y/n) [n]: n
Do you want to change the timezone from UTC? (y/n) [n]: y
PatchMon runs on port 3000 by default. Include the port in your URL unless you are
terminating it at a reverse proxy on a standard port (e.g. https://patchmon.example.com).
Examples: http://192.168.1.10:3000 https://patchmon.local:3000 https://patchmon.example.com
What URL will you use to access PatchMon? [http://localhost:3000]: http://miodominio.lab:3000
Add (a), Remove (r), or Done (d) [d]: d
|
AVVIARE IL CONTAINER
Eseguire il comandi:
|
0 |
docker compose up -d
|
Verificare che tutti i servizi siano Up:
|
0
1
2
3
4
5
6
7
8
9
10
11
|
[+] up 48/48
✔ Image postgres:17-alpine Pulled 10.6s
✔ Image redis:7-alpine Pulled 4.3s
✔ Image guacamole/guacd:latest Pulled 10.3s
✔ Image ghcr.io/patchmon/patchmon-server:latest Pulled 22.2s
✔ Network patchmon_patchmon-internal Created 0.0s
✔ Volume patchmon_postgres_data Created 0.0s
✔ Volume patchmon_redis_data Created 0.0s
✔ Container patchmon-database-1 Healthy 9.6s
✔ Container patchmon-redis-1 Healthy 10.1s
✔ Container patchmon-guacd-1 Healthy 11.6s
✔ Container patchmon-server-1 Started 5.5s
|
Eseguire il comando:
|
0 |
docker compose ps
|
Dovremmo vedere 4 container attivi: server, database (PostgreSQL), redis e guacd.
|
0
1
2
3
4
|
NAME IMAGE COMMAND SERVICE CREATED STATUS PORTS
patchmon-database-1 postgres:17-alpine "docker-entrypoint.s…" database 38 seconds ago Up 31 seconds (healthy) 5432/tcp
patchmon-guacd-1 guacamole/guacd:latest "/opt/guacamole/entr…" guacd 38 seconds ago Up 31 seconds (healthy) 4822/tcp
patchmon-redis-1 redis:7-alpine "docker-entrypoint.s…" redis 38 seconds ago Up 31 seconds (healthy) 6379/tcp
patchmon-server-1 ghcr.io/patchmon/patchmon-server:latest "./entrypoint.sh" server 32 seconds ago Up 25 seconds (healthy) 0.0.0.0:3000->3000/tcp, [::]:3000->3000/tcp
|
WIZARD DI PRIMO ACCESSO TRAMITE WEBGUI
Aprire il browser e richiamare l’URL che abbiamo configurato (es. http://miodominio.lab:3000).
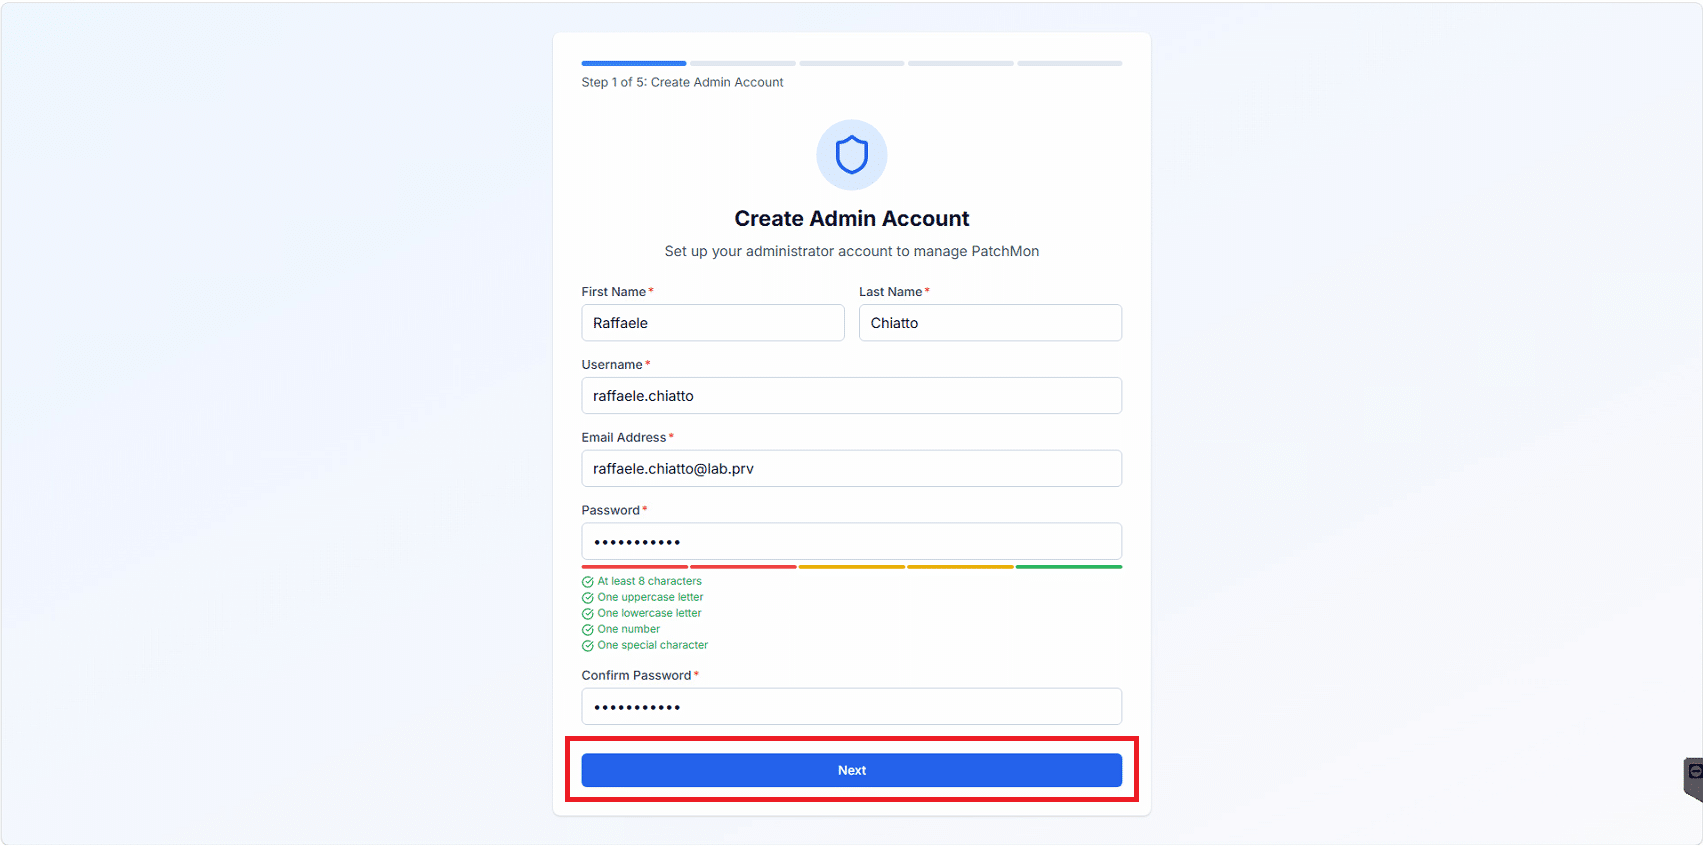
Inserire tutte le info richieste quindi cliccare Next
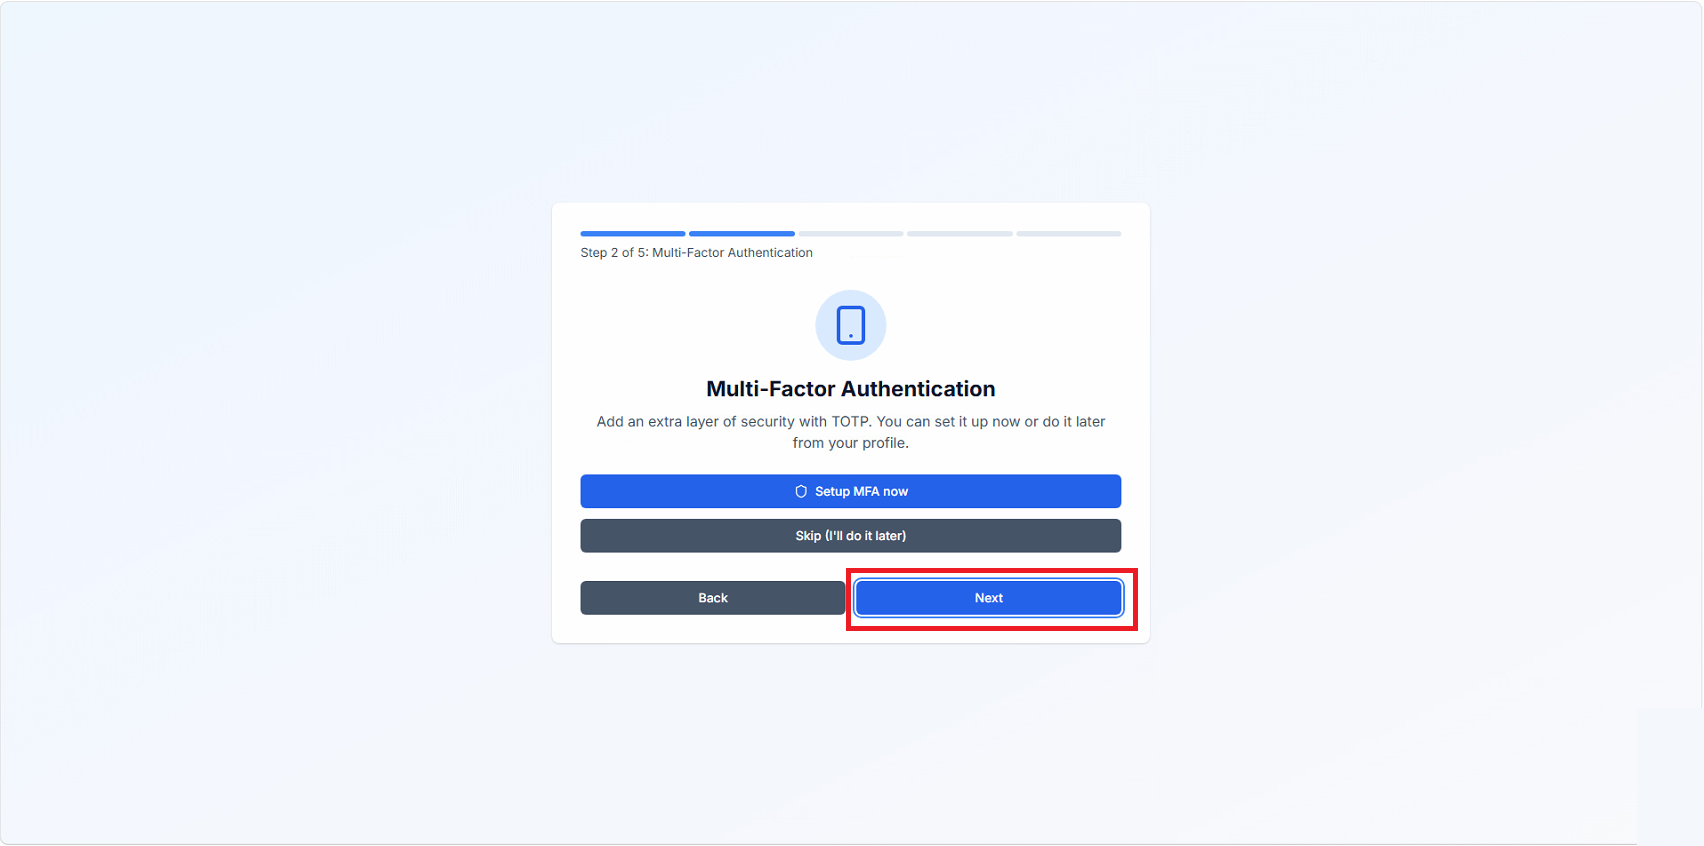
Scegliere ser attivare l’MFA subito oppure se farlo dopo quindi cliccare Next
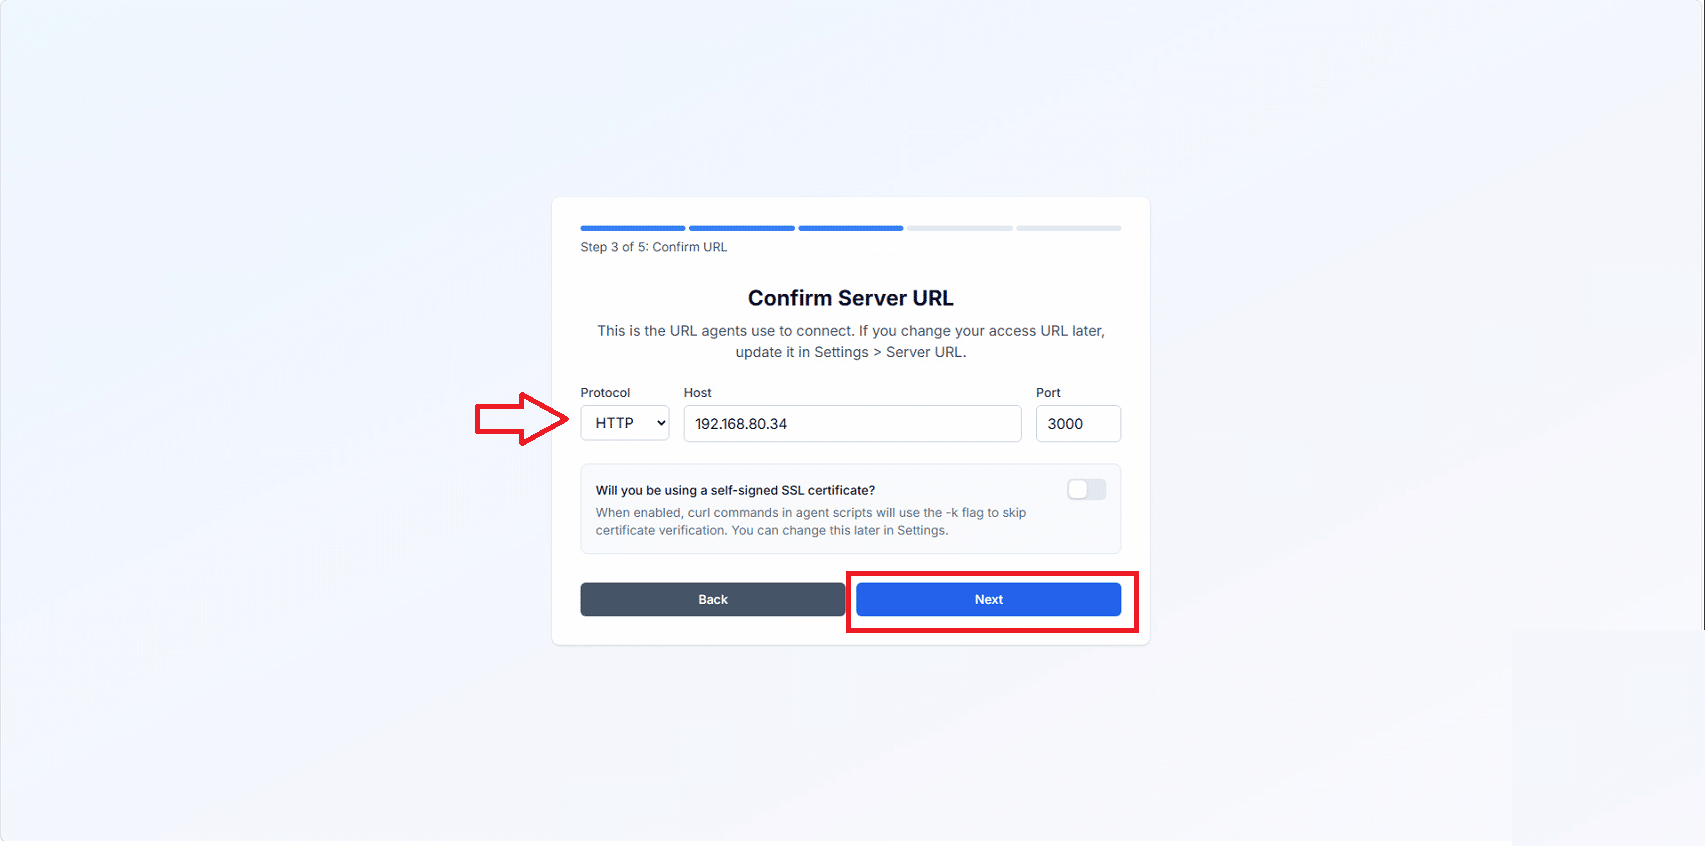
Confermare l’URL del Server e valutare se abilitare il Certificato Self Signed. Cliccare Next
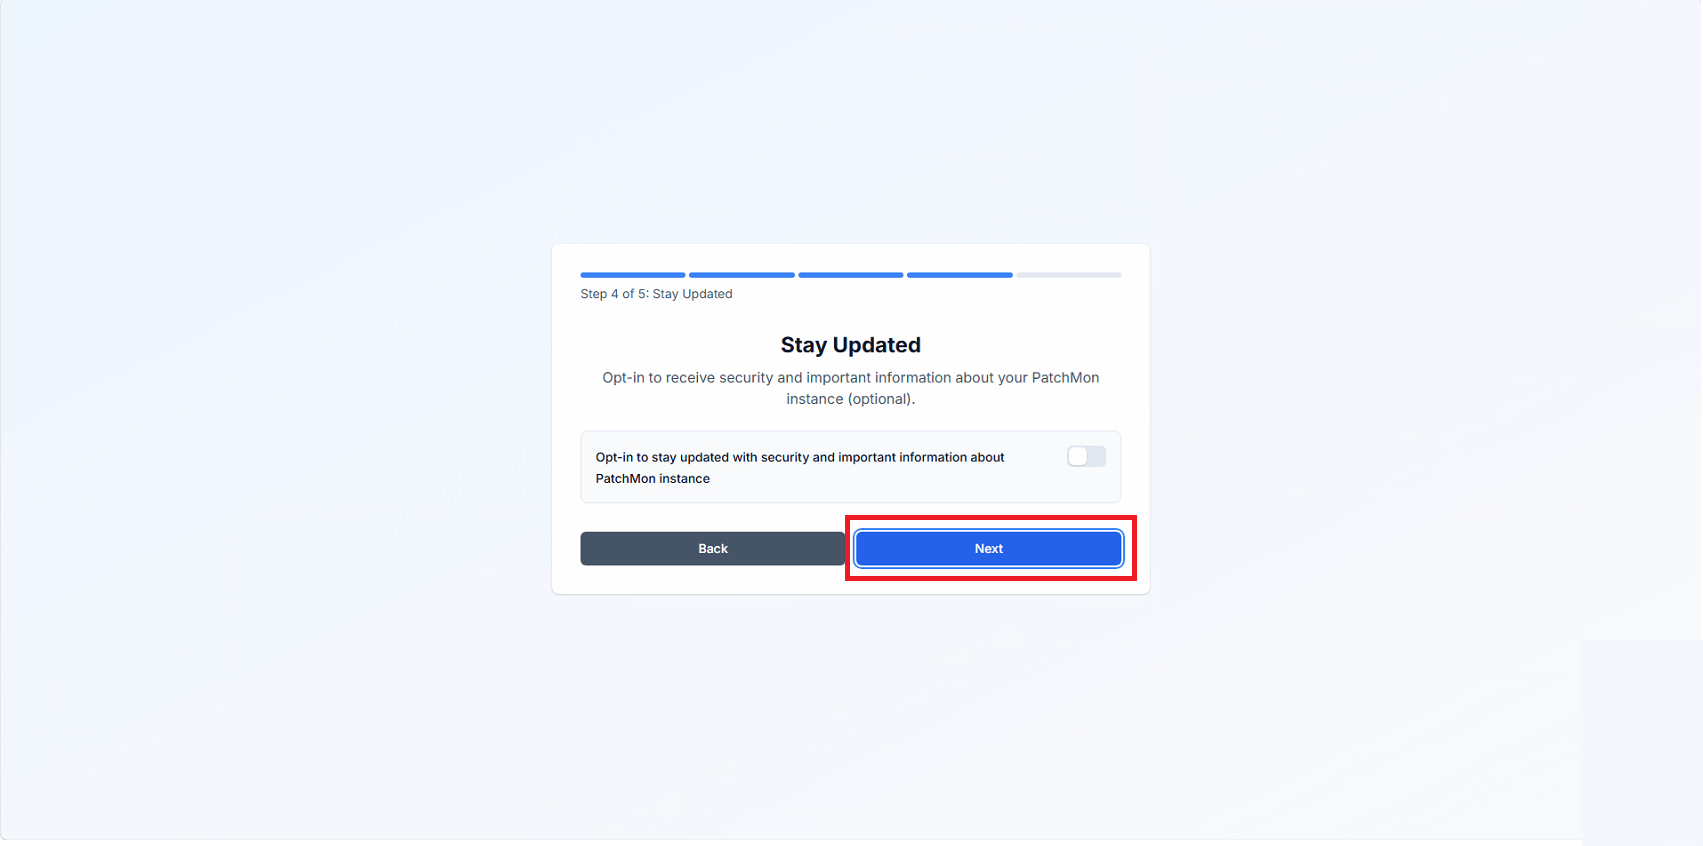
Cliccare Next
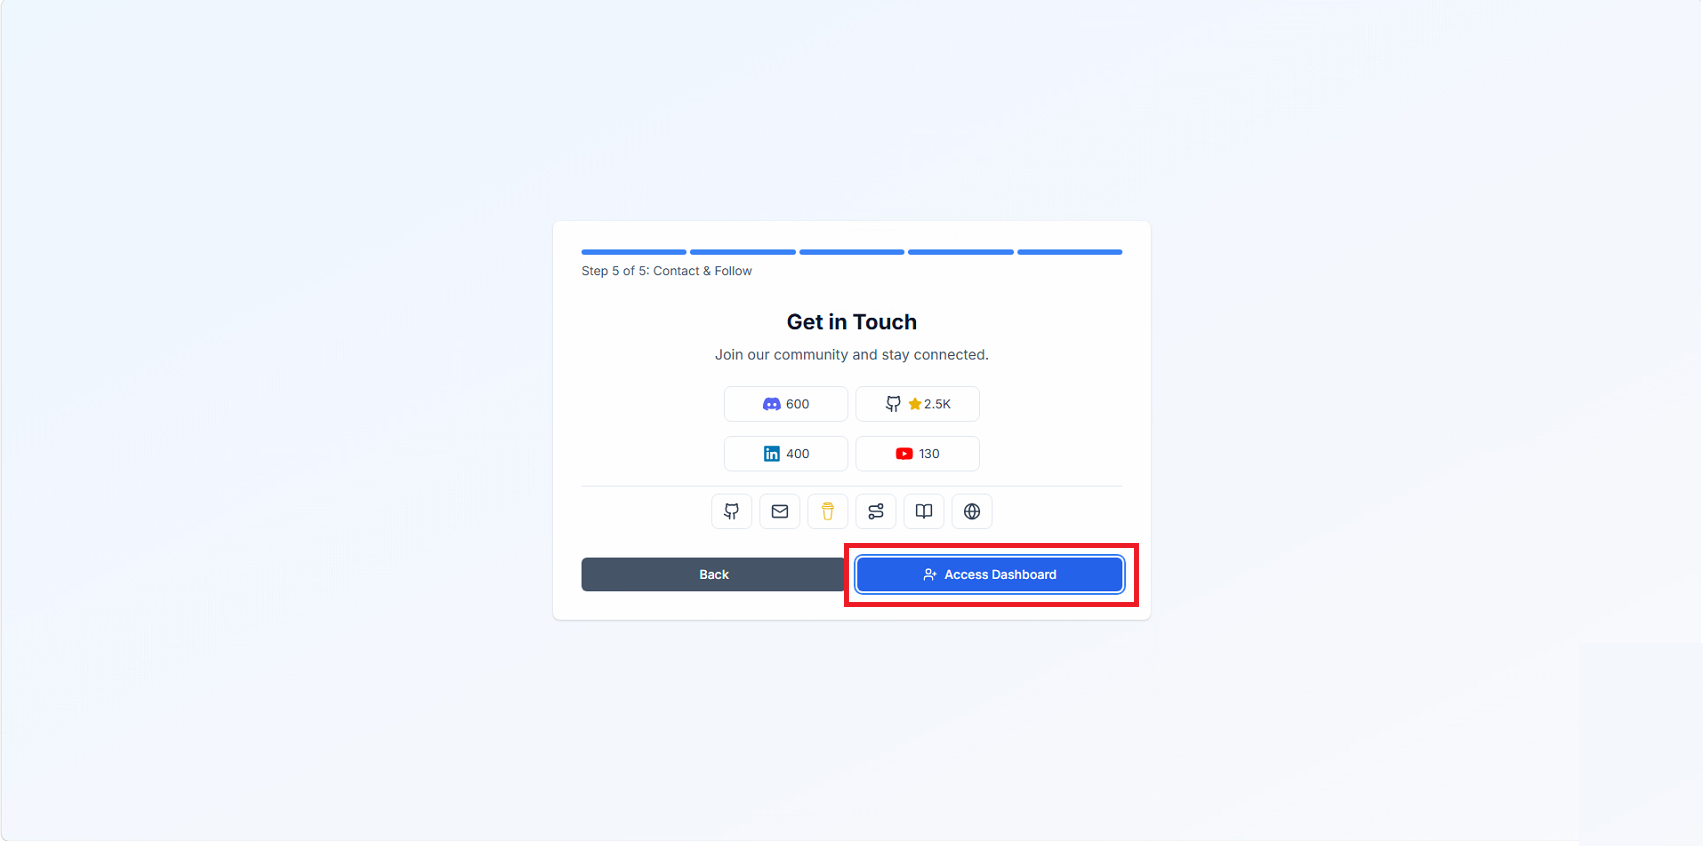
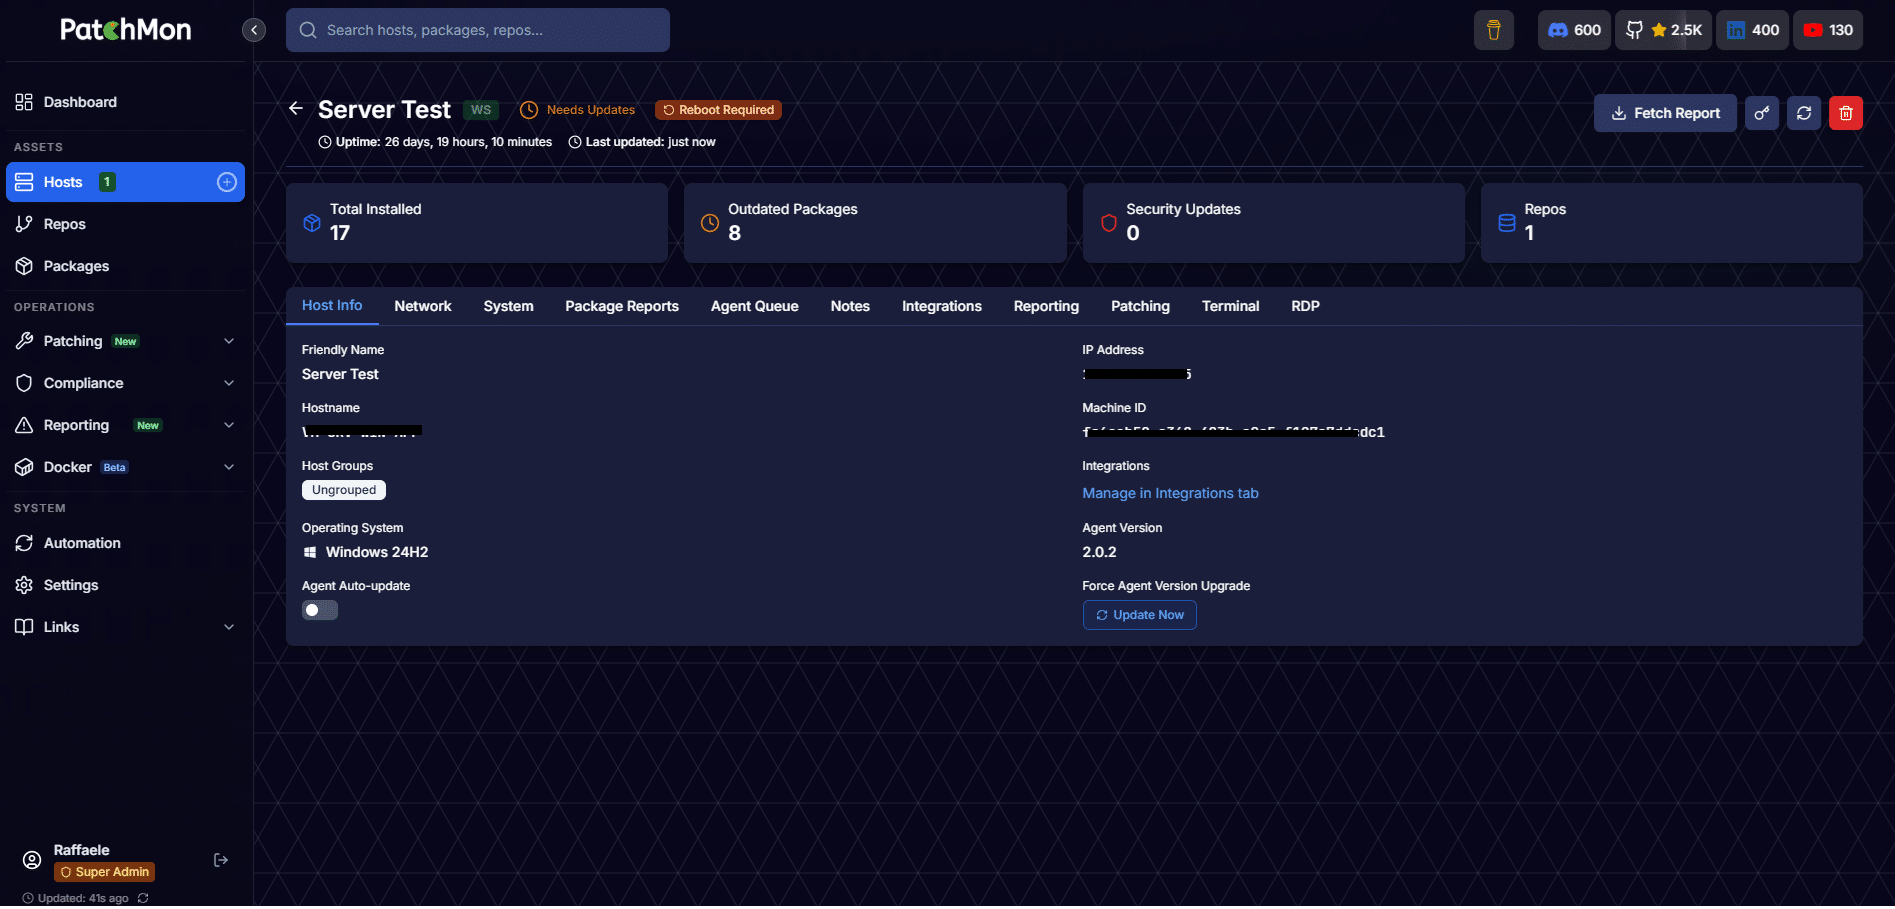
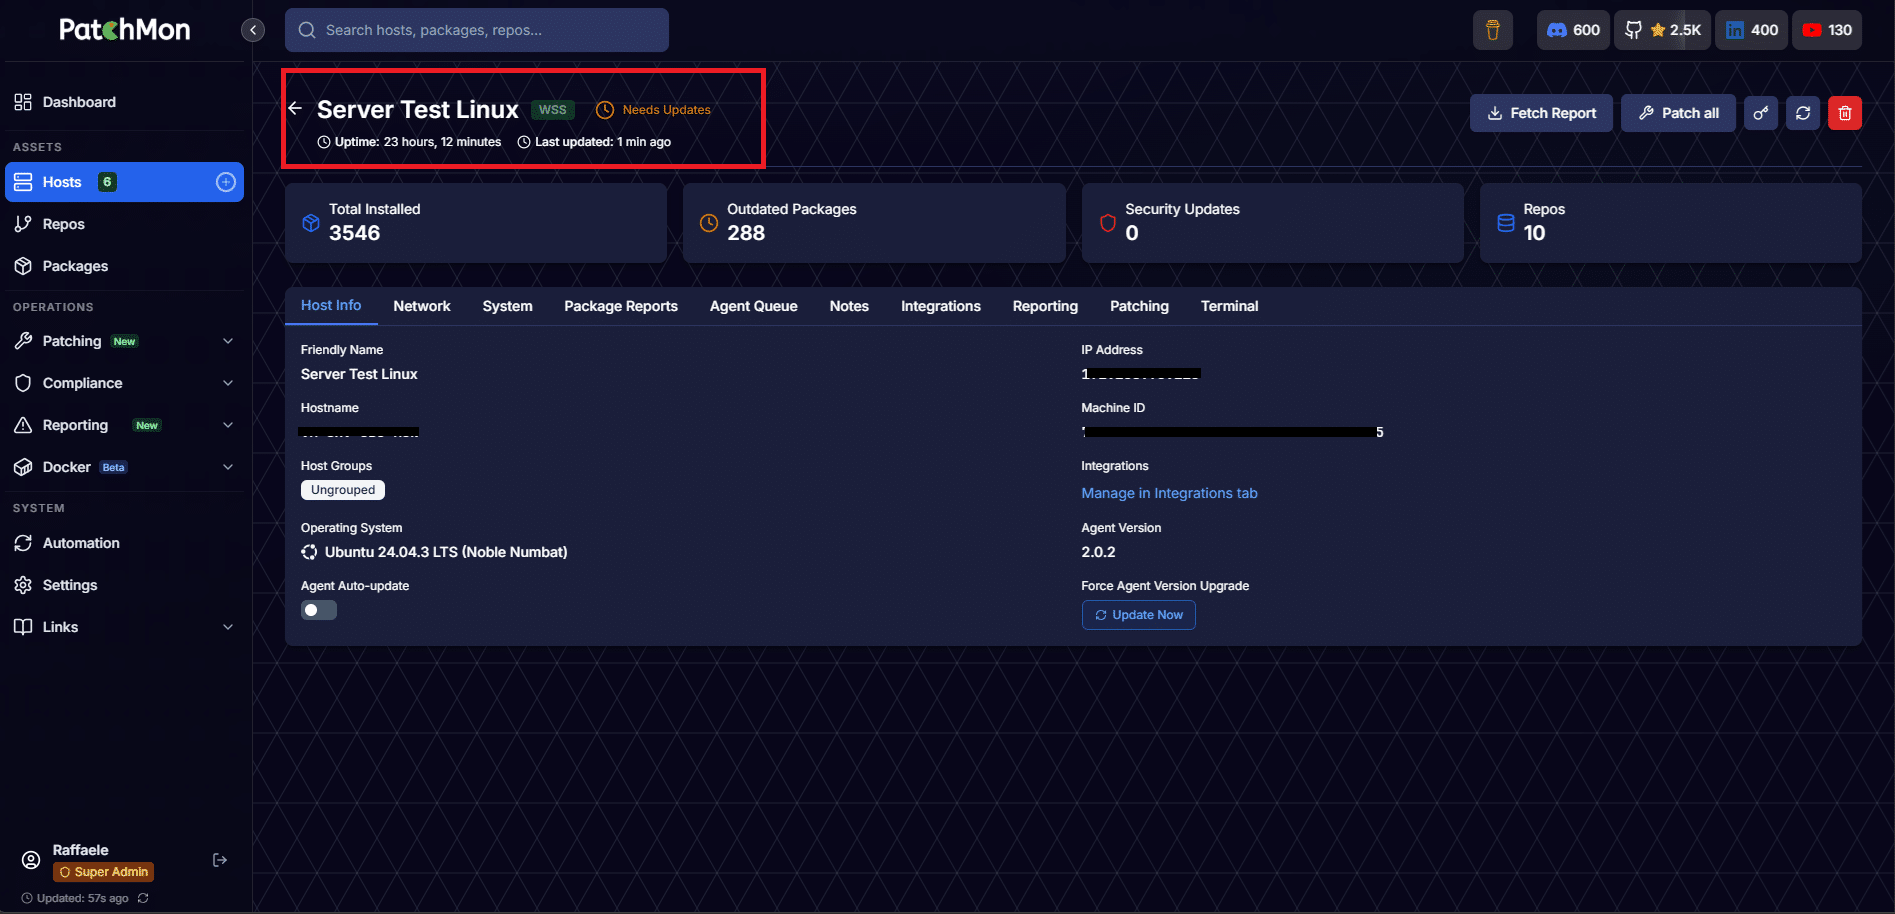
Cliccare su Access Dashboard
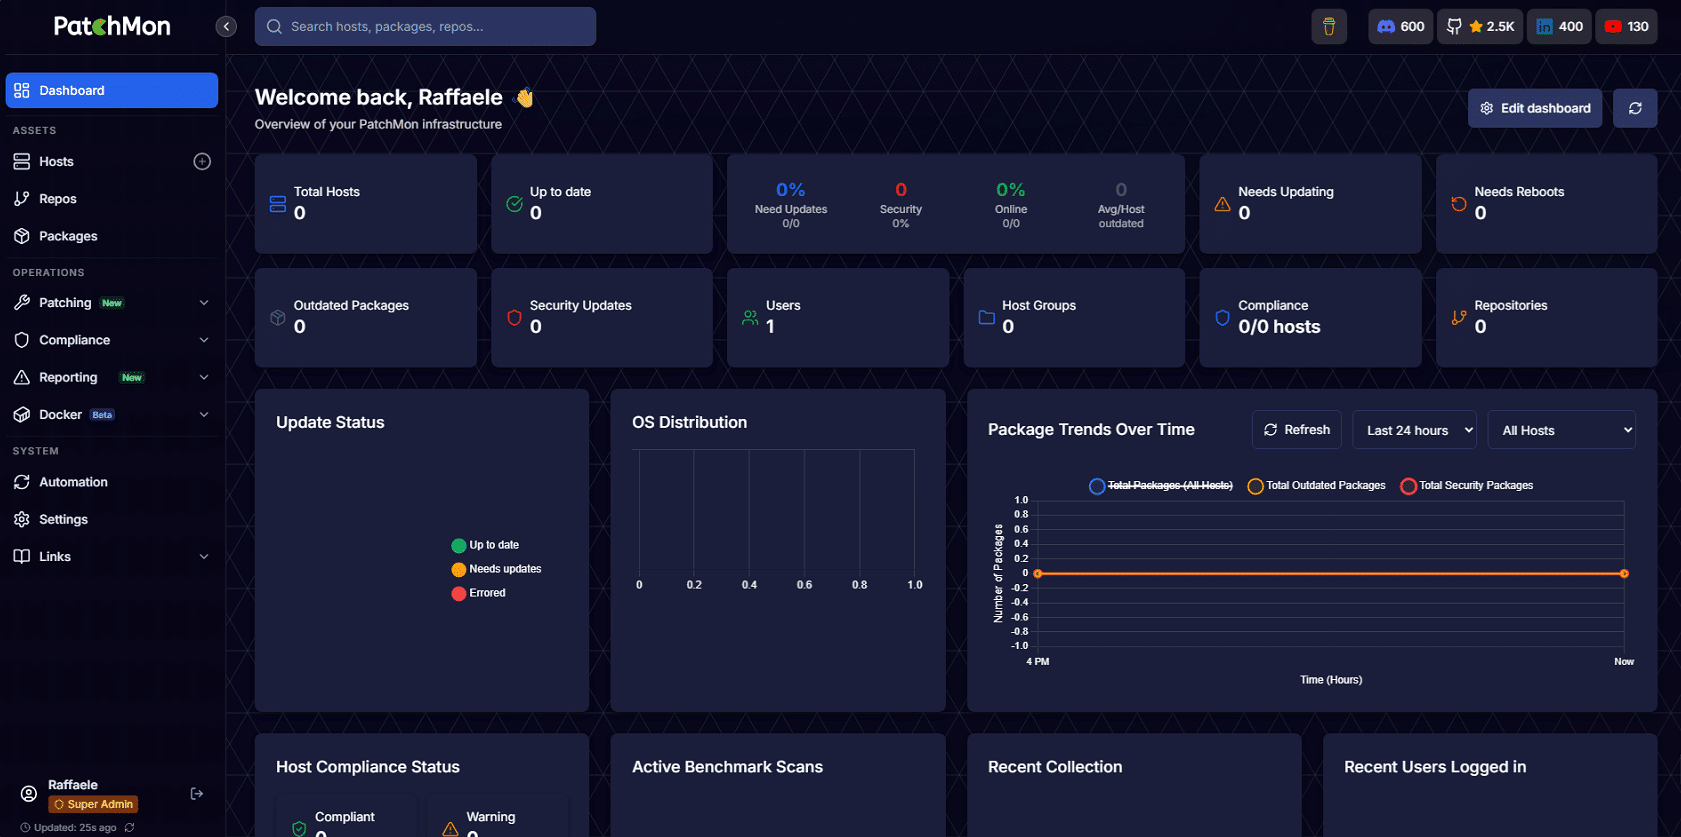
Se è tutto OK dovremmo visualizzare la Dashboard di Patchmon come mostrato nell’immagine sovrastante
AGGIUNTA DI UN SERVER WINDOWS A PATCHMON
Dalla Dashboard
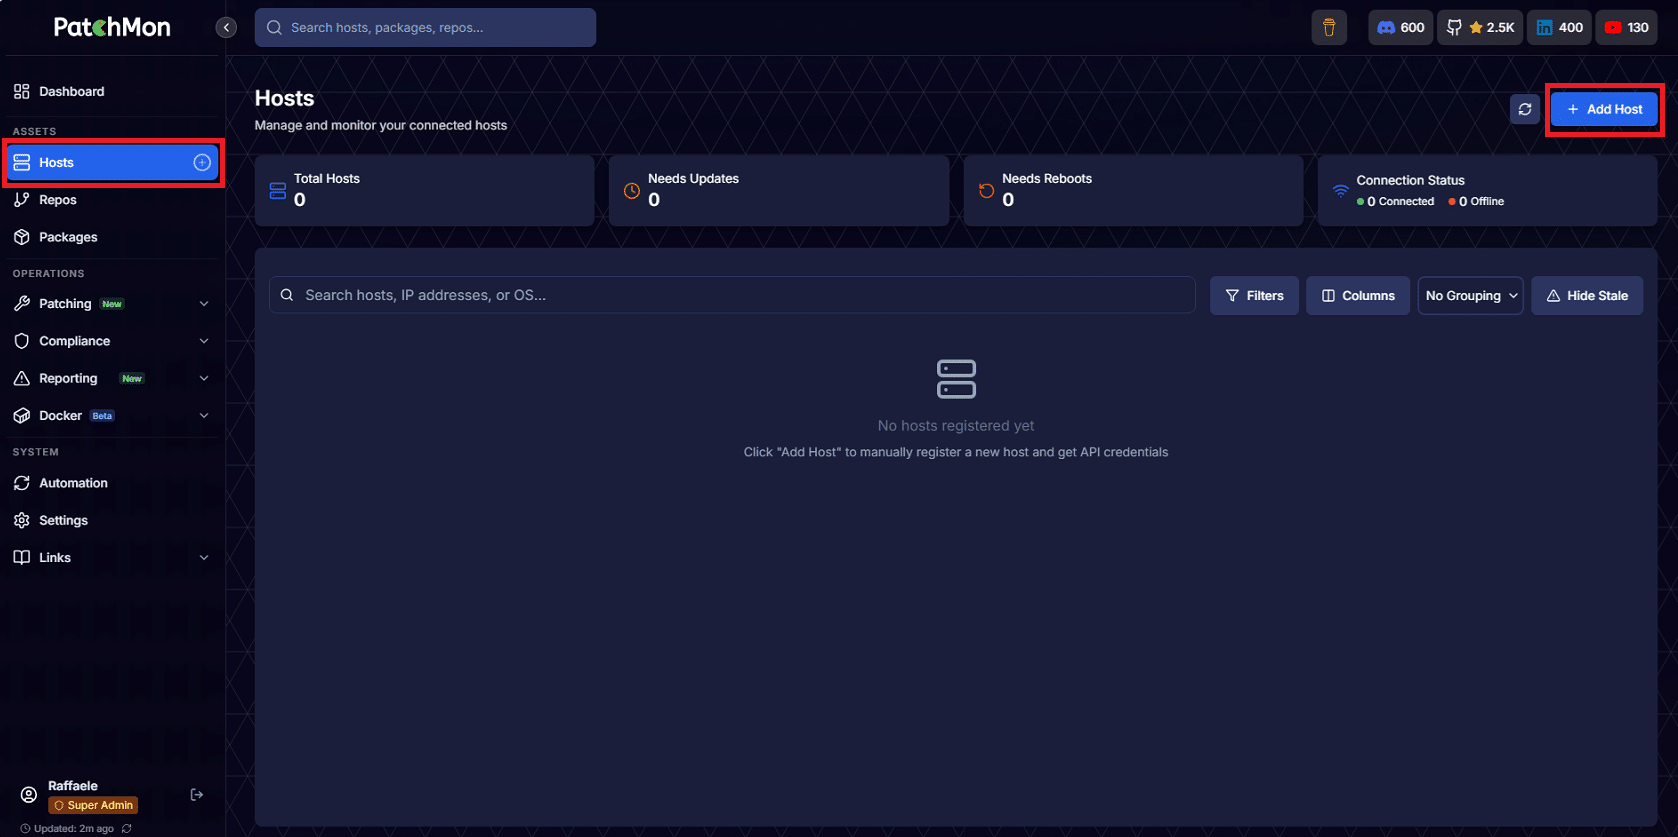
Cliccare su Host dal menu laterale quindi Add Host
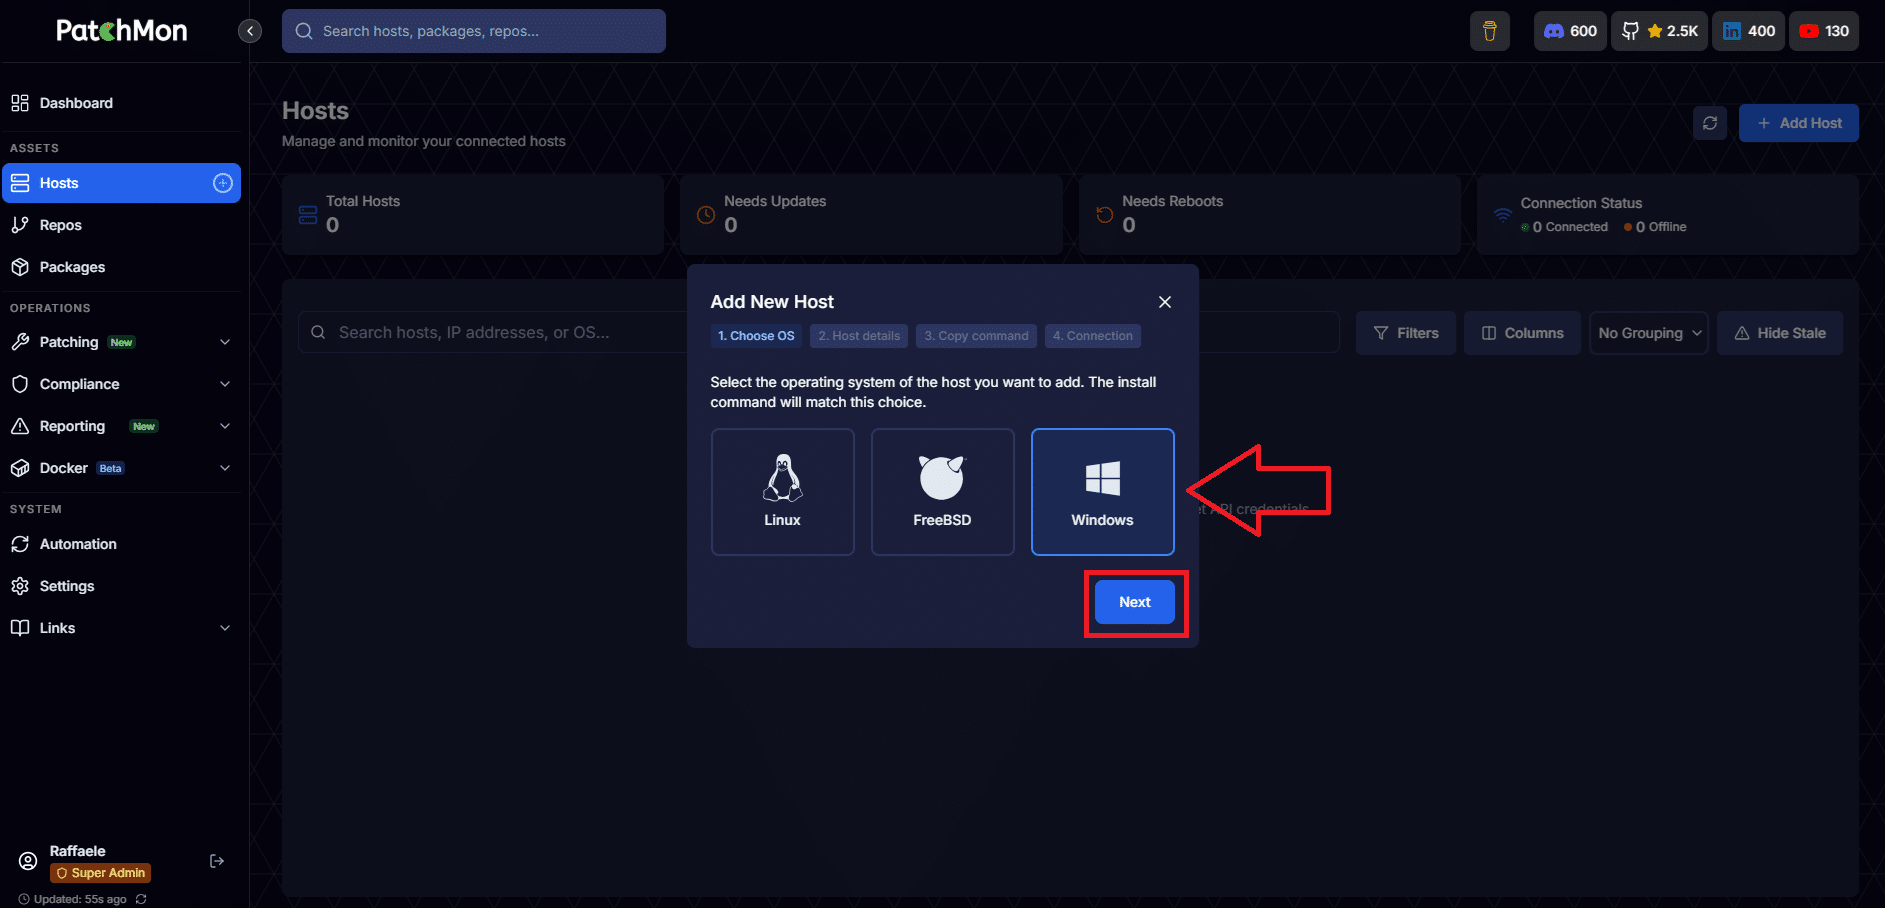
Selezionare Windows come tipolgia di server quindi cliccare Next
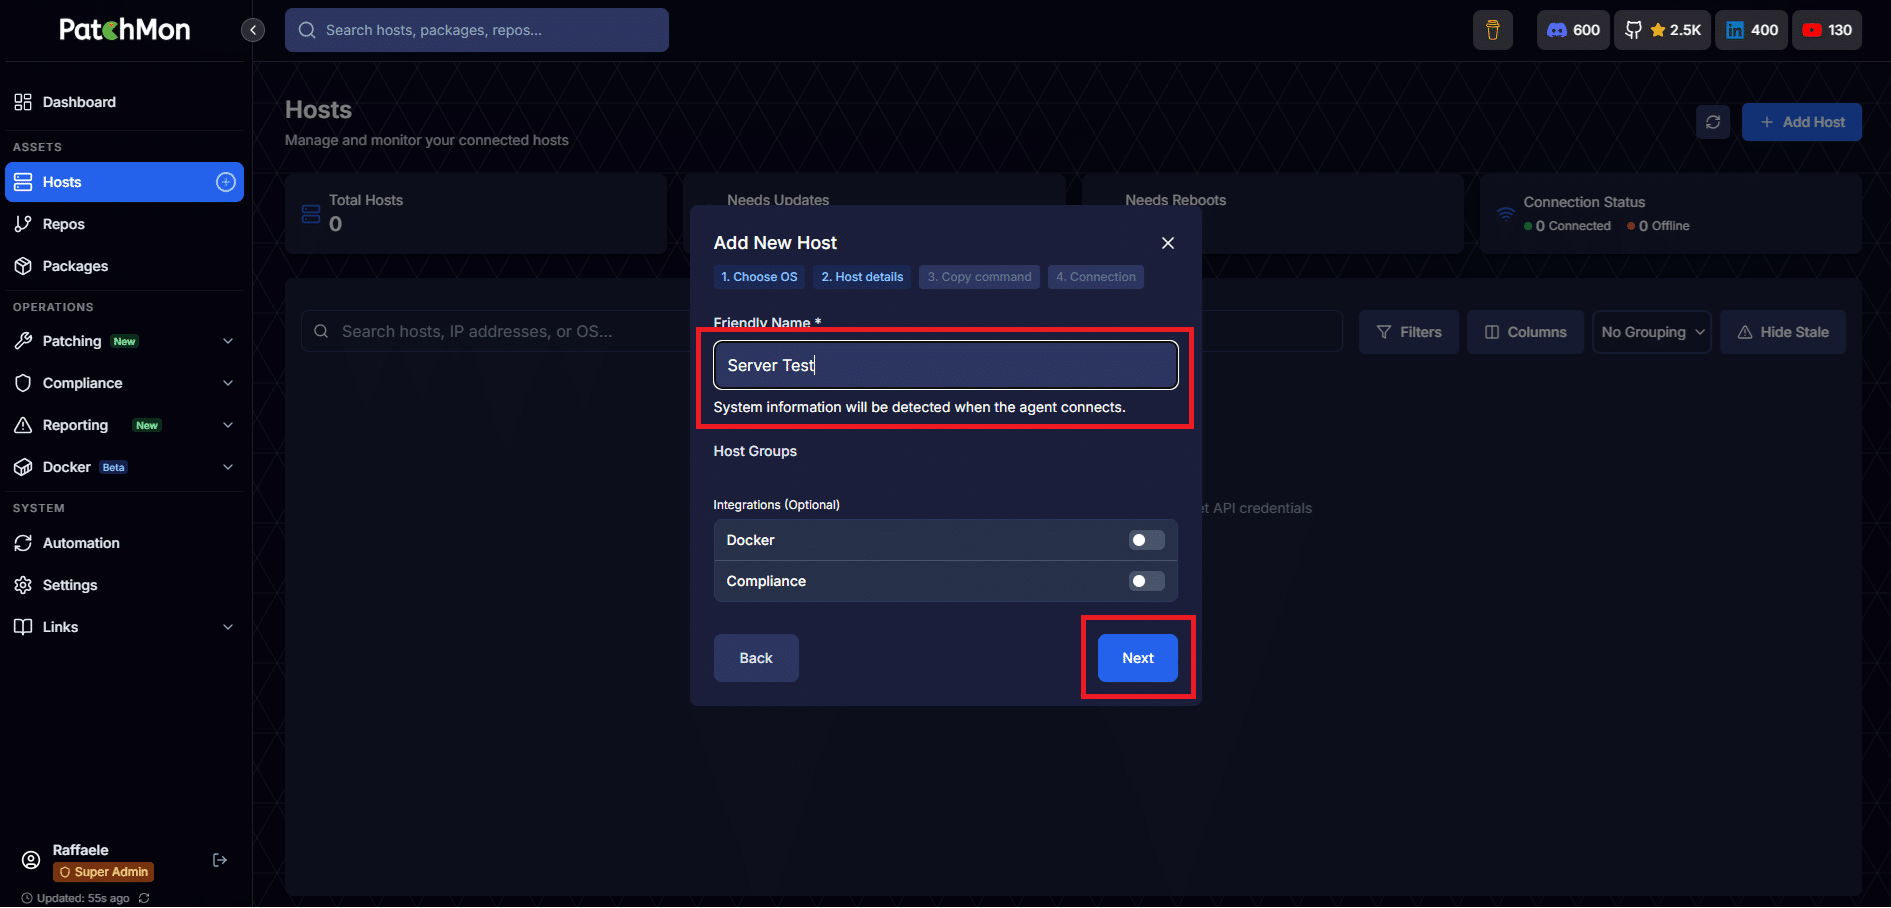
Inserire il nome quindi cliccare Next
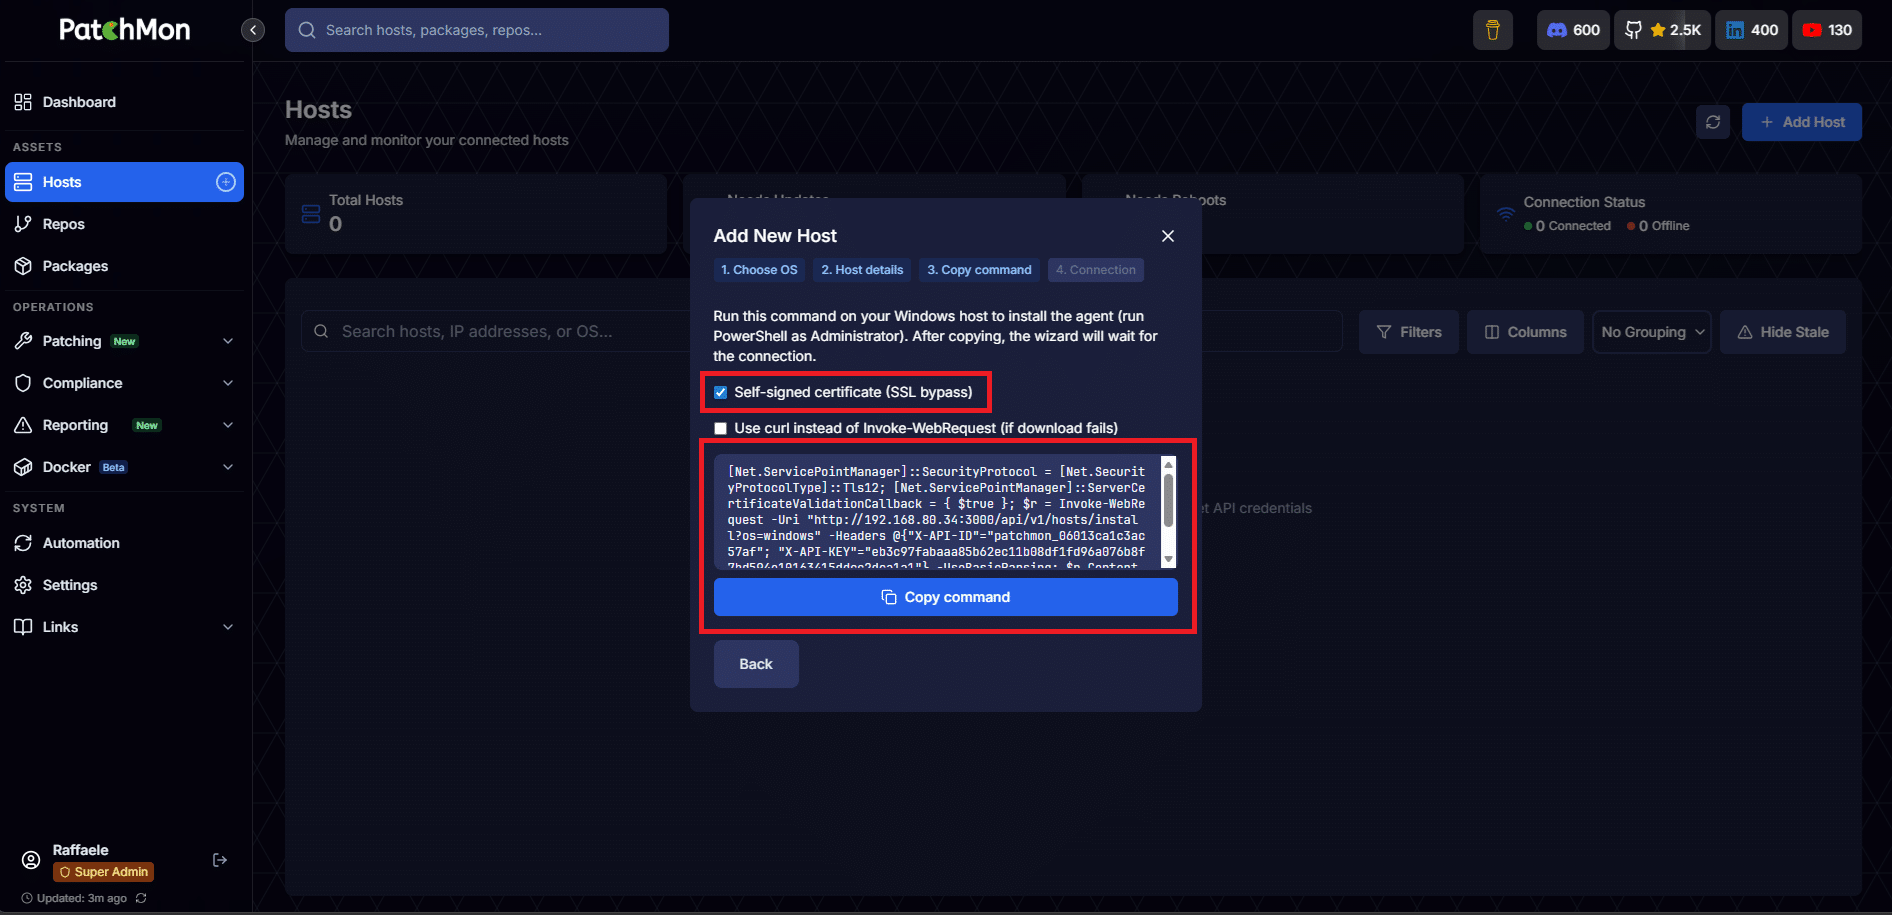
Copiare il comando da eseguire sul server da monitorare
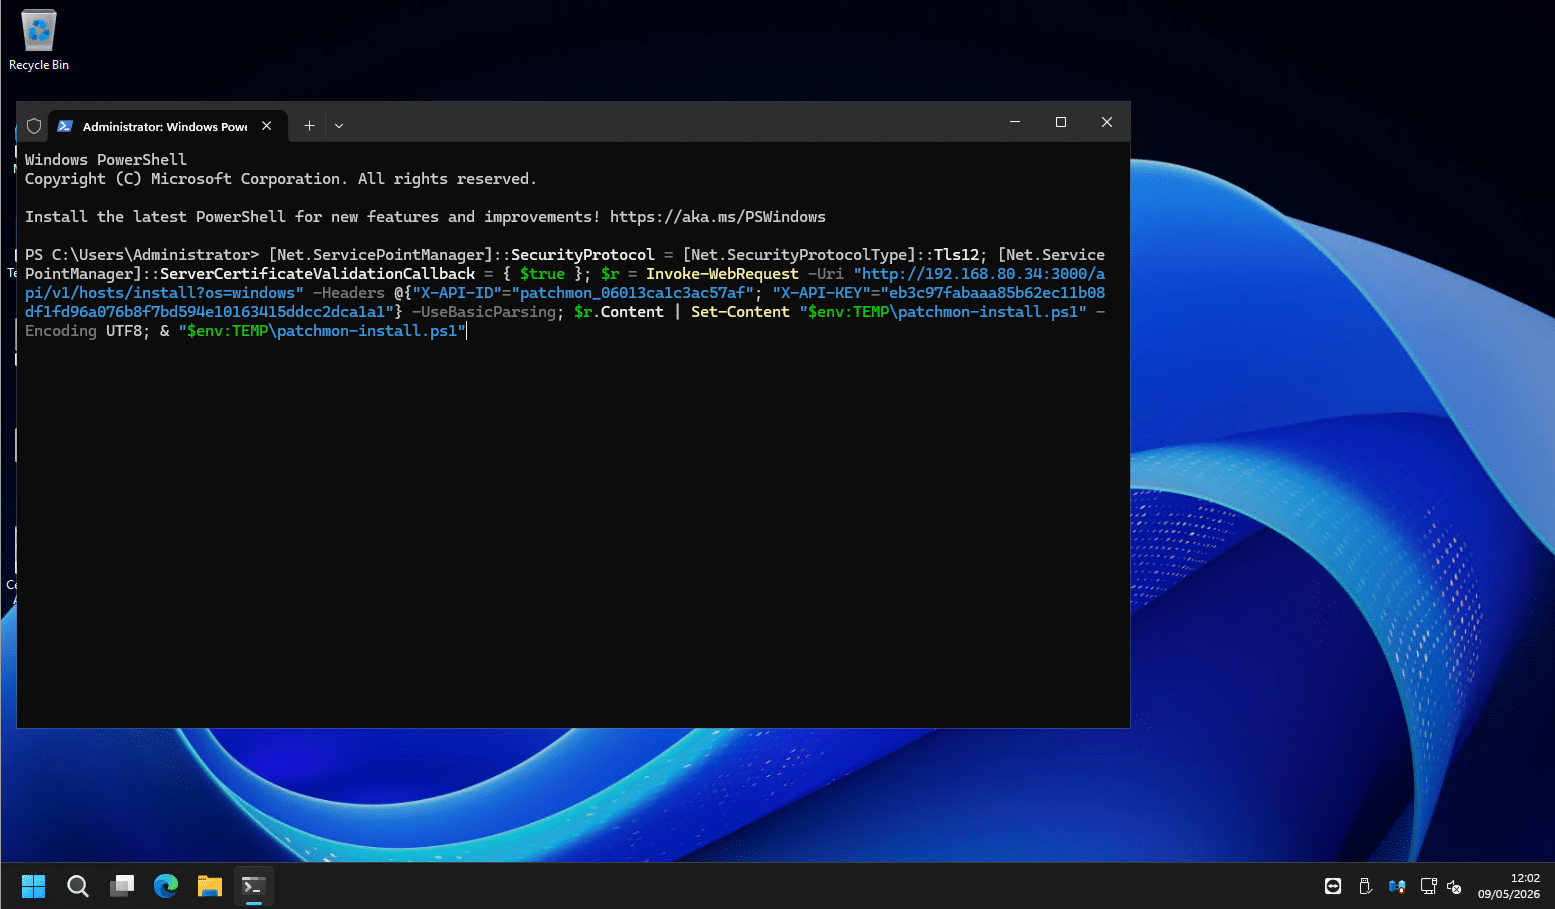
Sul server da monitorare aprire un Powershell con diritti amministrativi quindi incollare il comando
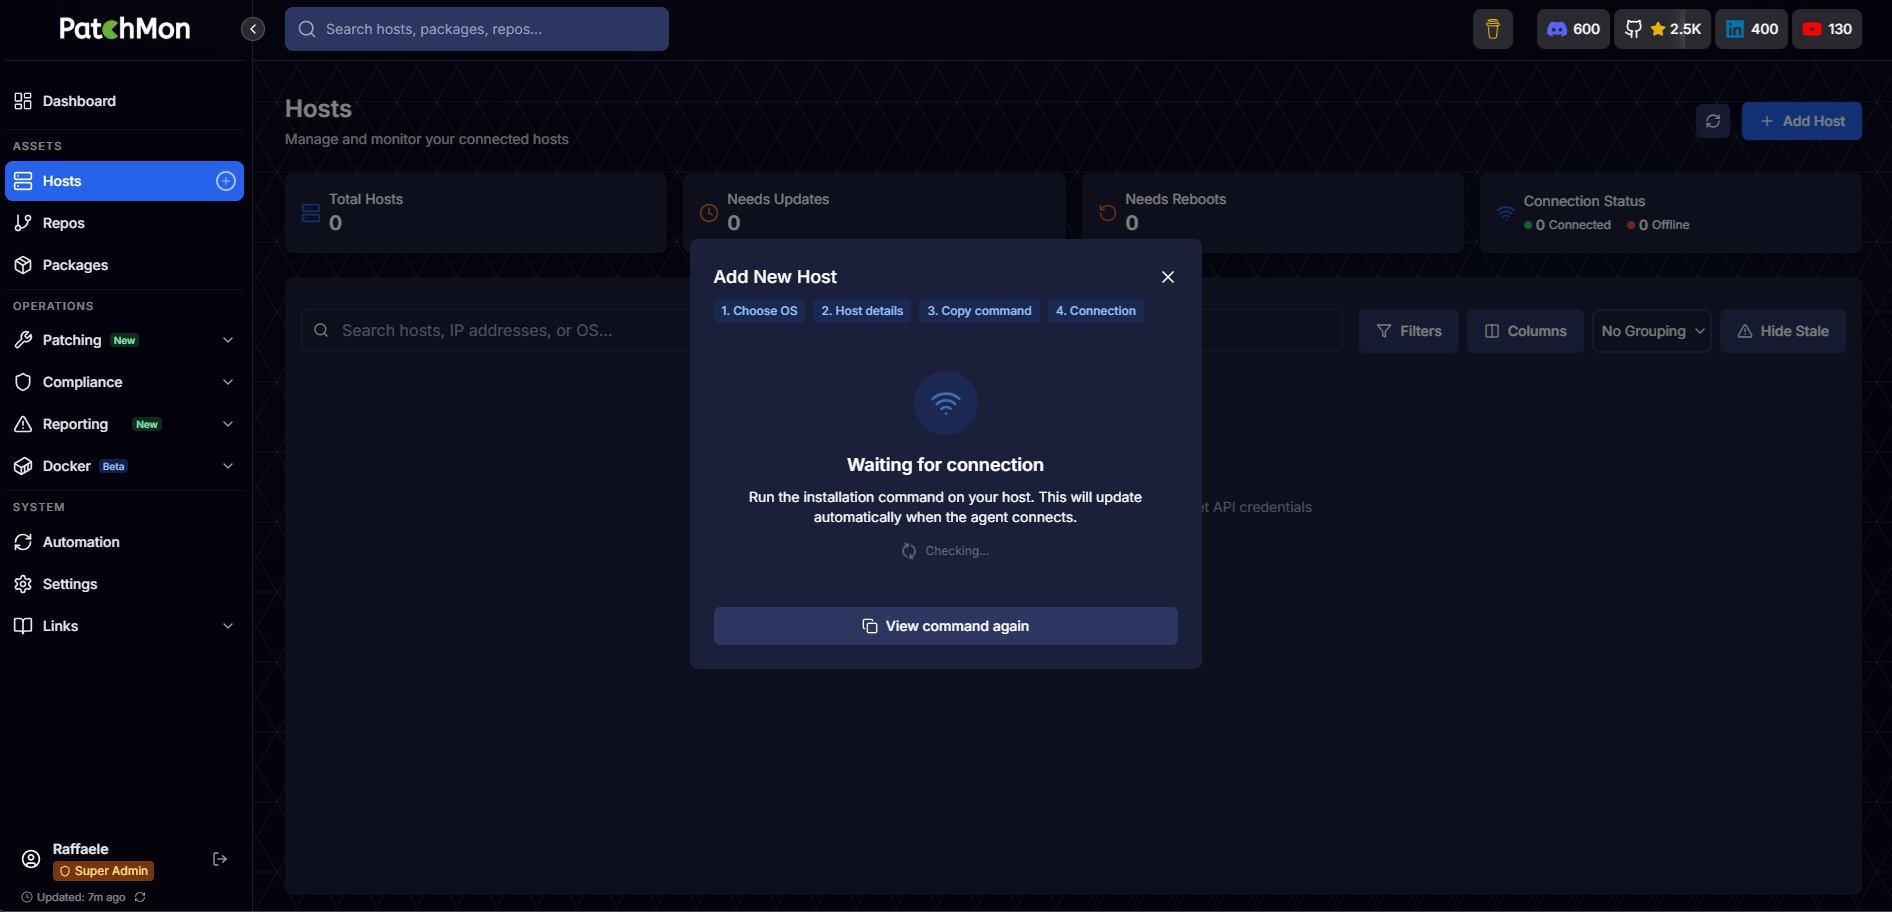
Sulla Console PatchMon dovremmo vedere Waiting for Connection
Sul Server da monitorare se è andato tutto a buon fine dovremmo visualizzare il seguente output del Powershell:
|
0
1
2
3
4
5
6
7
8
9
10
11
12
13
14
15
16
17
18
19
20
21
22
23
24
25
26
27
28
29
30
31
32
33
34
35
36
37
38
39
40
41
42
43
44
45
46
47
48
49
|
Encoding UTF8; & "$env:TEMP\patchmon-install.ps1"
Fetching credentials from PatchMon server...
Credentials received successfully.
PatchMon Agent Installation for Windows
=======================================
Downloading agent from PatchMon server: http://192.168.80.34:3000/api/v1/hosts/agent/download?arch=amd64&os=windows
Architecture: amd64
Install Path: C:\Program Files\PatchMon
Config Path: C:\ProgramData\PatchMon
Creating installation directory...
Creating configuration directory...
Downloading PatchMon agent...
Download completed.
Installing agent to C:\Program Files\PatchMon\patchmon-agent.exe...
Creating default configuration file...
Adding PatchMon to system PATH...
Configuring API credentials...
Credentials configured successfully.
Testing installation...
✅ API credentials are valid
✅ Connectivity test successful
Installation test successful!
Setting up Windows Service...
Creating Windows Service...
Service created successfully.
Starting service...
Service started successfully!
PatchMon Agent installation completed successfully!
Installation Summary:
⢠Configuration directory: C:\ProgramData\PatchMon
⢠Agent binary installed: C:\Program Files\PatchMon\patchmon-agent.exe
⢠Architecture: amd64
⢠Windows Service: configured and running
⢠API credentials configured and tested
⢠Logs: C:\ProgramData\PatchMon\patchmon-agent.log
Management Commands:
⢠Test connection: patchmon-agent ping
⢠Manual report: patchmon-agent report
⢠Check status: patchmon-agent diagnostics
⢠Service status: Get-Service -Name PatchMonAgent
⢠Service logs: Get-Content "C:\ProgramData\PatchMon\patchmon-agent.log" -Tail 50 -Wait
⢠Restart service: Restart-Service -Name PatchMonAgent
Your system is now being monitored by PatchMon!
|
Sulla Console PatchMon dovremmo visualizzare il server appena aggiunto
AGGIUNTA DI UN SERVER LINUX A PATCHMON
Dalla Dashboard

Cliccare su Host dal menu laterale quindi Add Host
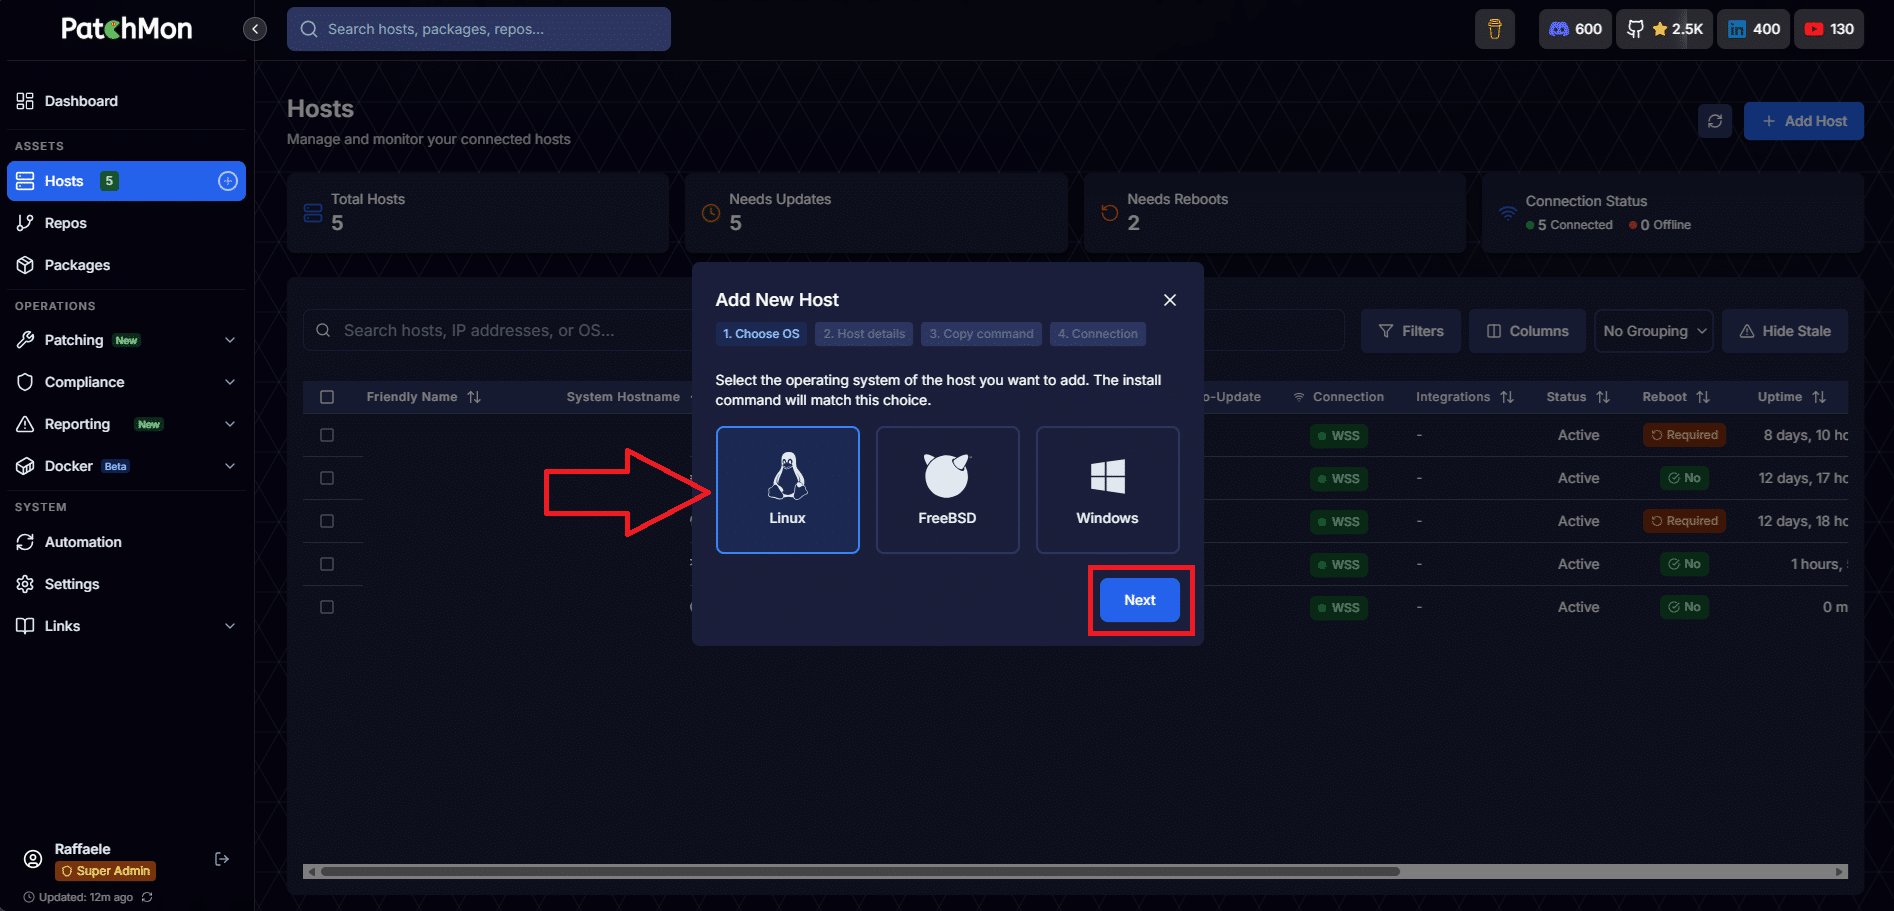
Selezionare Linux come tipologia di server quindi cliccare Next
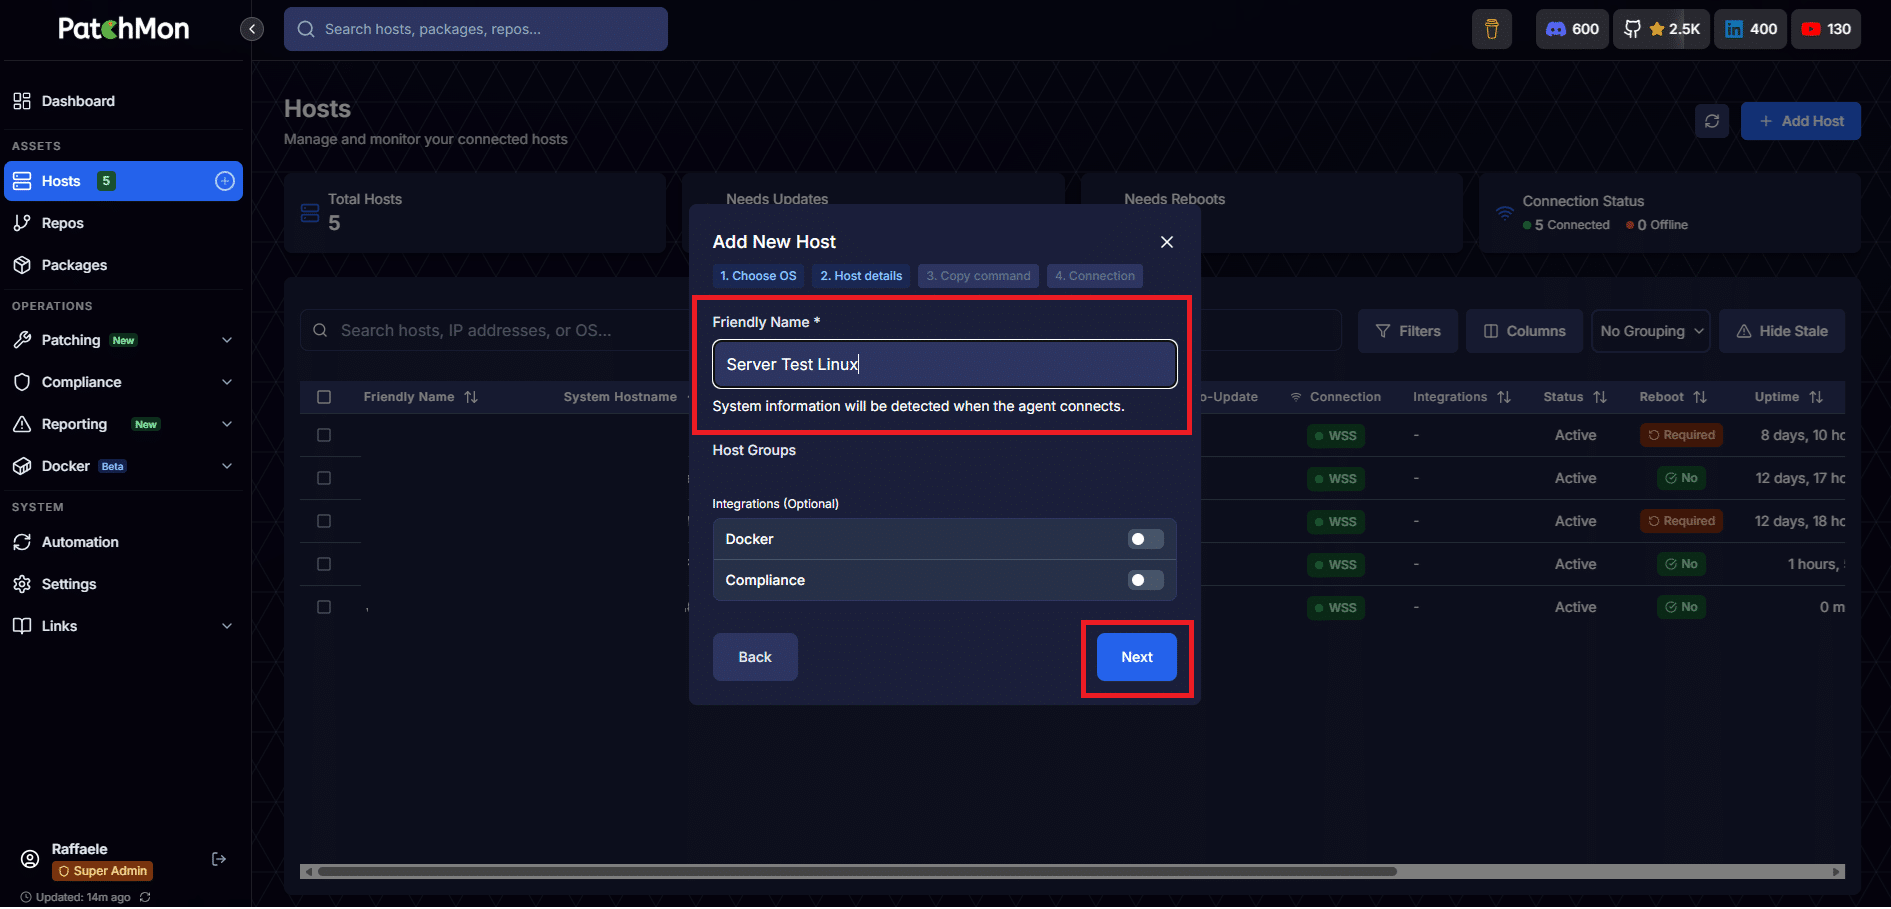
Inserire il nome quindi cliccare Next
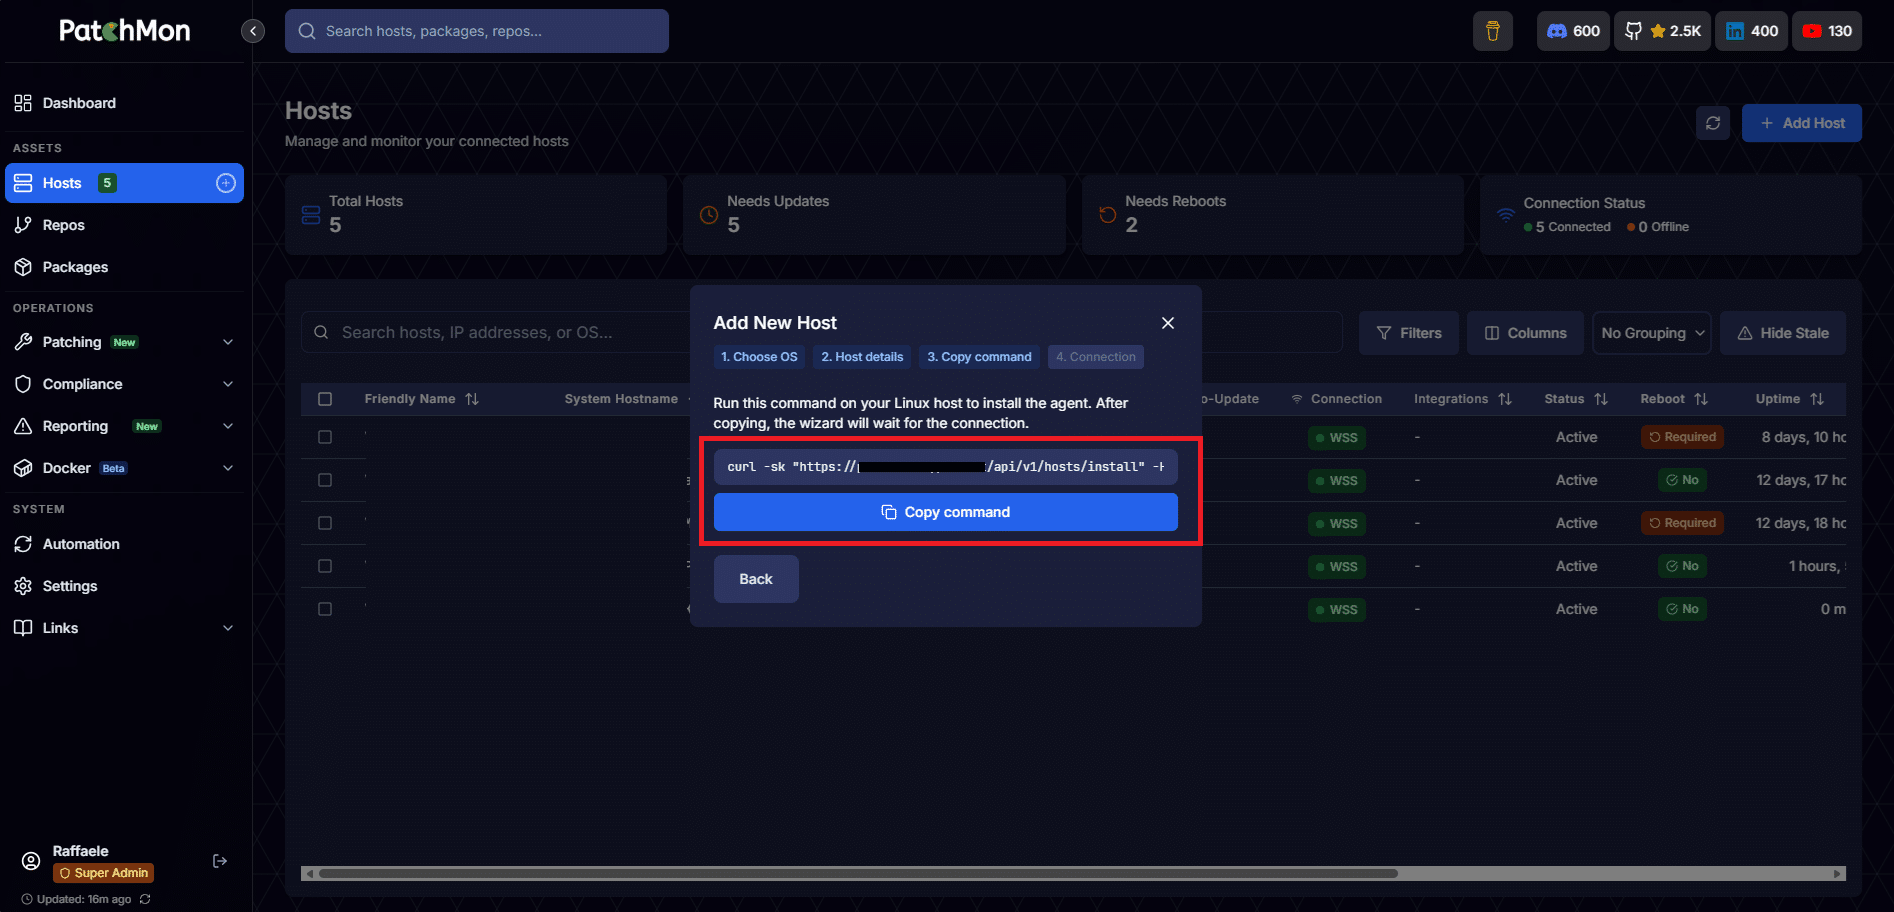
Copiare il comando da eseguire sul server Linux da monitorare
Dopo aver eseguito il comando sul server da monitorare se è tutto OK dovremmo visualizzare il seguente output:
|
0
1
2
3
4
5
6
7
8
9
10
11
12
13
14
15
16
17
18
19
20
21
22
23
24
25
26
27
28
29
30
31
32
33
34
35
36
37
38
39
40
41
42
|
INFO: Installing curl...
SUCCESS: All required packages are already installed
SUCCESS: Dependencies installation completed
INFO: Setting up configuration directory...
INFO: Creating new configuration directory...
INFO: Checking if agent is already configured...
SUCCESS: Agent not yet configured - proceeding with installation
INFO: Creating configuration files...
INFO: Downloading PatchMon agent binary...
INFO: Agent version: Unknown
INFO: Setting up log directory...
INFO: Testing API credentials and connectivity...
✅ API credentials are valid
✅ Connectivity test successful
SUCCESS: TEST: API credentials are valid and server is reachable
INFO: Setting up systemd service...
Created symlink /etc/systemd/system/multi-user.target.wants/patchmon-agent.service → /etc/systemd/system/patchmon-agent.service.
SUCCESS: PatchMon Agent service started successfully
INFO: WebSocket connection established
SUCCESS: PatchMon Agent installation completed successfully!
Installation Summary:
• Configuration directory: /etc/patchmon
• Agent binary installed: /usr/local/bin/patchmon-agent
• Architecture: amd64
• Dependencies installed: curl
• Systemd service configured and running
• API credentials configured and tested
• WebSocket connection established
• Logs directory: /etc/patchmon/logs
Management Commands:
• Test connection: /usr/local/bin/patchmon-agent ping
• Manual report: /usr/local/bin/patchmon-agent report
• Check status: /usr/local/bin/patchmon-agent diagnostics
• Service status: systemctl status patchmon-agent
• Service logs: journalctl -u patchmon-agent -f
• Restart service: systemctl restart patchmon-agent
SUCCESS: Your system is now being monitored by PatchMon!
|
Se è andato tutto a buon fine sulla console di PatchMon dovremmo visualizzare il server aggiunto
DISINSTALLAZIONE DELL’AGENT PATCHMON DA UN HOST WINDOWS
Su un server Windows eseguire con una console Powershell con diritti amministrativi eseguire i comandi:
|
0
1
2
3
4
5
6
7
8
9
10
11
12
13
14
15
|
<strong># 1. Ferma il servizio</strong>
Stop-Service -Name "patchmon-agent" -Force -ErrorAction SilentlyContinue
<strong># 2. Rimuovi il servizio Windows</strong>
sc.exe delete "patchmon-agent"
<strong># 3. Rimuovi il binario e i file dell'agente</strong>
Remove-Item -Path "C:\Program Files\patchmon-agent\*" -Recurse -Force -ErrorAction SilentlyContinue
Remove-Item -Path "C:\Program Files\patchmon-agent" -Recurse -Force -ErrorAction SilentlyContinue
<strong># 4. Rimuovi la configurazione e le credenziali</strong>
Remove-Item -Path "C:\ProgramData\patchmon\*" -Recurse -Force -ErrorAction SilentlyContinue
Remove-Item -Path "C:\ProgramData\patchmon" -Recurse -Force -ErrorAction SilentlyContinue
<strong># 5. Verifica che il servizio sia stato rimosso</strong>
Get-Service -Name "patchmon-agent" -ErrorAction SilentlyContinue
|
NOTA BENE: rimuovere l’agente dall’host non lo elimina automaticamente dalla dashboard di PatchMon. Ricordati di cancellare l’host anche dalla UI per tenerla pulita
DISINSTALLAZIONE DELL’AGENT PATCHMON DA UN HOST LINUX
Su un server Linux eseguire l’agente include un comando di disinstallazione integrato:
|
0
1
2
3
4
5
6
7
|
<strong># Rimozione base (binario + crontab)</strong>
sudo patchmon-agent uninstall
<strong># Rimozione completa (binario + config + log)</strong>
sudo patchmon-agent uninstall --remove-all
<strong># Rimozione silenziosa senza conferma</strong>
sudo patchmon-agent uninstall -af
|
Se il server non è raggiungibile, puoi rimuovere l’agente manualmente:
|
0
1
2
3
4
5
6
7
8
9
10
11
12
13
14
15
16
17
18
19
20
21
22
23
24
25
26
27
28
29
30
31
32
|
<strong># 1. Ferma e disabilita il servizio (systemd)</strong>
sudo systemctl stop patchmon-agent
sudo systemctl disable patchmon-agent
sudo rm -f /etc/systemd/system/patchmon-agent.service
sudo systemctl daemon-reload
<strong># 2. Termina eventuali processi residui</strong>
sudo pkill -f patchmon-agent
<strong># 3. Rimuovi il binario</strong>
sudo rm -f /usr/local/bin/patchmon-agent
sudo rm -f /usr/local/bin/patchmon-agent.backup.*
<strong># 4. Rimuovi configurazione e log</strong>
sudo rm -rf /etc/patchmon/
<strong># 5. Rimuovi eventuali entry crontab</strong>
crontab -l 2>/dev/null | grep -v "patchmon-agent" | crontab -
<strong># 6. Verifica la rimozione completa</strong>
which patchmon-agent # deve restituire vuoto
ls /etc/patchmon/ 2>/dev/null # deve dire "No such file or directory"
systemctl status patchmon-agent 2>&1 | head -1 # deve dire "not found"
Per Alpine Linux (OpenRC) al posto dei comandi systemd usa:
bashsudo rc-service patchmon-agent stop
sudo rc-update del patchmon-agent default
sudo rm -f /etc/init.d/patchmon-agent
|
NOTA BENE: rimuovere l’agente dall’host non lo elimina automaticamente dalla dashboard di PatchMon. Ricordati di cancellare l’host anche dalla UI per tenerla pulita
AGGIORNAMENTO DI PATCHMON
Per aggiornare PatchMon eseguire i comandi elencati di seguito:
|
0
1
2
3
4
|
cd ~/patchmon
docker compose pull
docker compose up -d
|
CONFIGURAZIONE DI PATCHMON DIETRO REVERSE PROXY
La configurazione si articola in due parti: il file .env di PatchMon e il Proxy Host in NPM.
Parte 1 — Modificare il file .env di PatchMon
Questo è il passaggio più importante. Apri il file .env nella directory di PatchMon:
|
0 |
nano ~/patchmon/.env
|
Individuare e modificare le seguenti variabili:
|
0
1
2
3
4
5
6
7
8
9
10
|
env# URL pubblico del tuo server PatchMon
SERVER_PROTOCOL=https
SERVER_HOST=patchmon.tuodominio.it
SERVER_PORT=443
CORS_ORIGIN=https://patchmon.tuodominio.it
# OBBLIGATORIO con NPM o qualsiasi reverse proxy
TRUST_PROXY=true
# Abilita HSTS in produzione con HTTPS
ENABLE_HSTS=true
|
⚠️ TRUST_PROXY ora è true per default in v2. La maggior parte degli utenti usa PatchMon dietro un reverse proxy (Traefik, Caddy, Nginx, NPM); il precedente default false causava problemi di login OIDC e perdita degli IP reali dei client. Se esponi PatchMon direttamente su IP pubblico senza proxy, imposta esplicitamente TRUST_PROXY=false.
Dopo aver salvato, riavvia i container con i comandi:
|
0
1
|
cd ~/patchmon
docker compose down && docker compose up -d
|
Parte 2 — Configurare il Proxy Host in NPM
Accedere alla dashboard di NPM (http://IP-NPM:81)
Andare su Proxy Hosts → Add Proxy Host
Compila la scheda Details così:
Domain Names: patchmon.tuodominio.it
Scheme: http
Forward Hostname / IP: IP del server PatchMon (es. 192.168.1.100)
Forward Port: 3000
Cache Assets❌ Off
Block Common Exploits✅ On
Websockets Support✅ On ← fondamentale
Nella scheda SSL:
- Selezionare o richiedere un certificato Let’s Encrypt
- Abilitare Force SSL
- Abilitare HTTP/2 Support
Nella scheda Advanced, incollare queste direttive custom per garantire il corretto passaggio degli header ai WebSocket:
nginxproxy_set_header Host $host;
proxy_set_header X-Real-IP $remote_addr;
proxy_set_header X-Forwarded-For $proxy_add_x_forwarded_for;
proxy_set_header X-Forwarded-Proto $scheme;
# WebSocket
proxy_http_version 1.1;
proxy_set_header Upgrade $http_upgrade;
proxy_set_header Connection “upgrade”;
proxy_read_timeout 3600s;
proxy_send_timeout 3600s;
Cliccare Save
Perché i WebSocket sono critici
TLS in produzione: usa sempre HTTPS e WSS. L’agente assume WSS quando l’URL del server inizia con https://. Quando sei dietro Nginx (o simili), assicurati che l’header X-Forwarded-Proto: https venga inviato correttamente al backend, in modo che rilevi la connessione sicura.
Gli agenti usano HTTPS per i report e la configurazione, e WSS (WebSocket over TLS) per eventi in tempo reale come lo streaming live delle patch e lo stato Docker. Assicurati che i WebSocket siano supportati dal proxy quando inoltri il traffico al container PatchMon sulla porta 3000.
Verifica finale
Dopo aver salvato tutto, controlla che la connessione sia corretta accedendo a https://patchmon.tuodominio.it.
Nella dashboard, gli agenti connessi dovrebbero mostrare lo stato WSS (verde) e non WS (non sicuro).
Se un agente già installato usa il vecchio URL HTTP, aggiorna la sua configurazione
NOTE IMPORTANTI
UFW e Docker: Ubuntu 26.04 usa UFW come firewall, ma Docker manipola iptables direttamente, bypassando UFW. Se esponi una porta tramite Docker, questa rimane aperta al pubblico anche se bloccata in UFW. Per mitigare, fai bind solo su localhost e usa un reverse proxy (Nginx, Caddy, NPM) per l’accesso esterno.
Reverse proxy e WebSocket: assicurati che il tuo proxy supporti i WebSocket, poiché gli agenti li usano per eventi in tempo reale (WSS su porta 443).


0 commenti