


Teampass è un gestore password web based utile per memorizzare e accedere alle password in modo sicuro utilizzando il database MySQL.
È stato progettato per l’ambiente aziendale e fornisce un potente strumento per personalizzare l’accesso delle password a seconda del ruolo degli utenti.
Questo articolo spiega come installare e configurare Teampass su Ubuntu 16.04 con Apache e Mysql.
PRE REQUISITI
Apache, MySQL, PHP 5.5.0 o superiore
Estensioni PHP: mcrypt, openssl, ldap (if used), mbstring, bcmath, iconv, xml, gd, openssl, mysqlnd
Unzip
INSTALLAZIONE UNZIP
Installare il pacchetto unzip con il comando
|
0 |
sudo apt-get install unzip |
INSTALLAZIONE APACHE E MYSQL SERVER
Apache2 è disponibile come pacchetto in Ubuntu, installarlo utilizzando il seguente comando.
La directory principale del virtual host predefinito di Apache è /var/www/html e il file di configurazione principale è /etc/apache2/apache2.conf
Lanciamo il comando:
|
0 |
sudo apt-get install apache2 |
Installiamo anche il MySQL Server con il comando:
|
0 |
sudo apt-get install mysql-server |
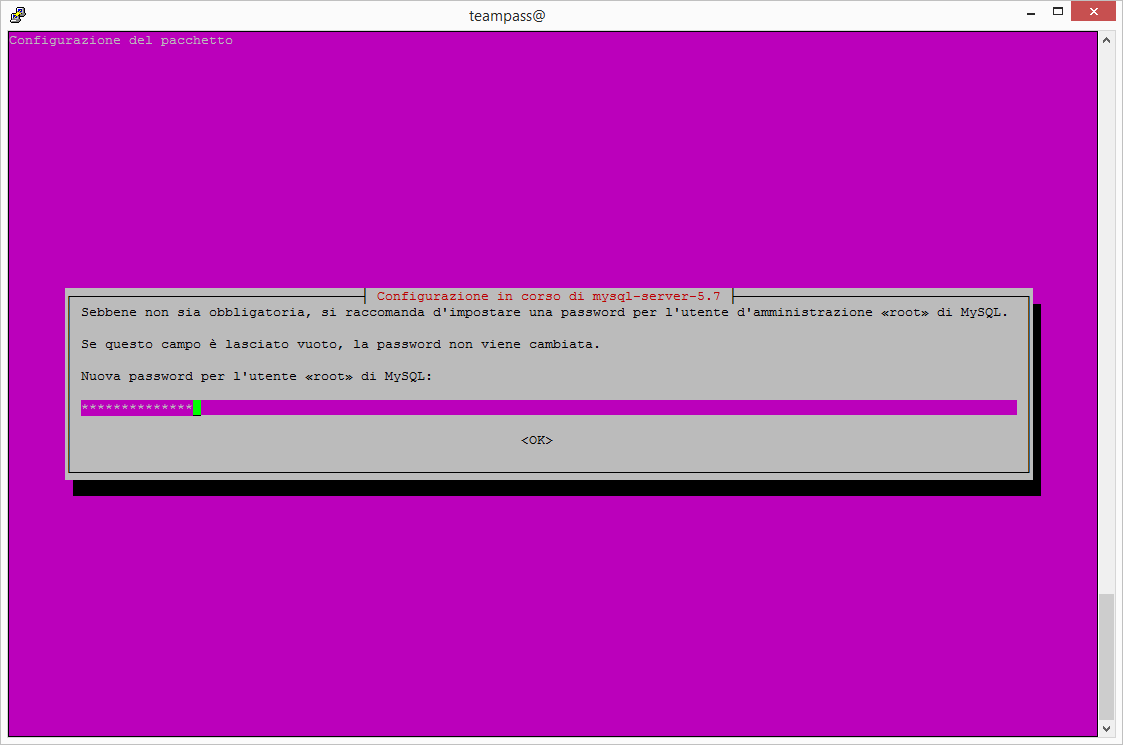
Inserire la password dell’utente di root di MySQL
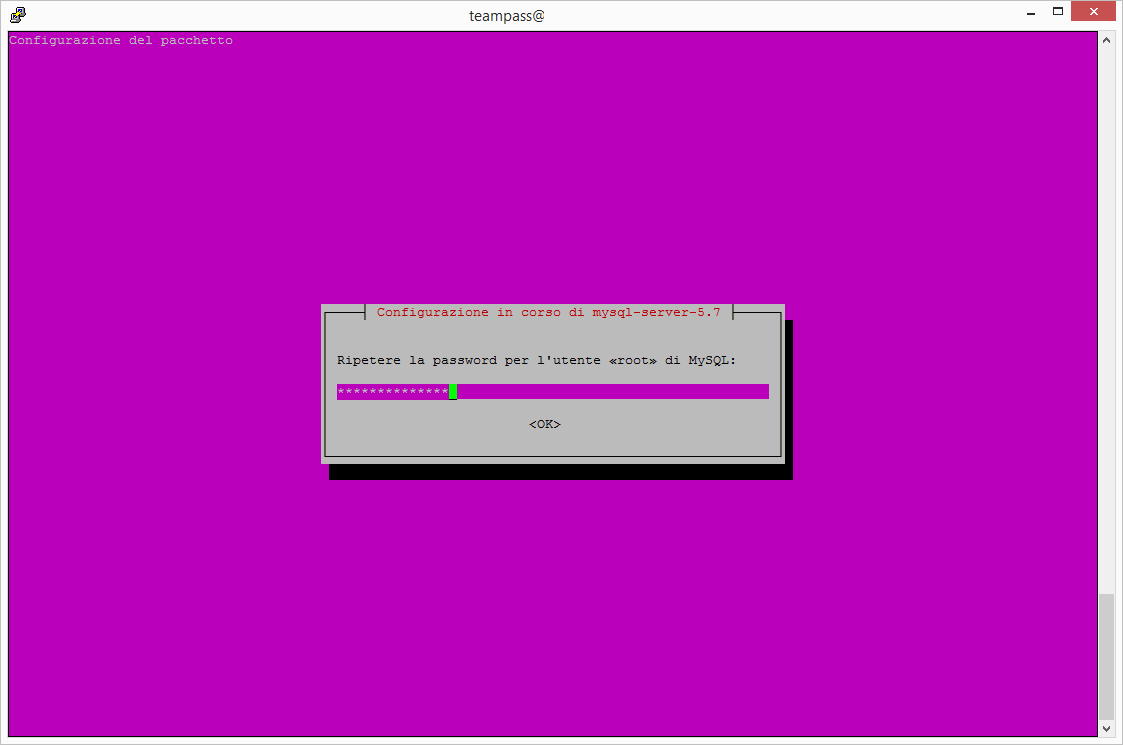
Reinserire la password di root quindi OK
Facoltativamente, è possibile procedere con l’installazione sicura di MySql.
Basta rispondere a poche domande per un’installazione sicura.
Lanciamo il comando:
|
0 |
sudo mysql_secure_installation |
Quindi rispondiamo alle domande come segue:
|
0 1 2 3 4 5 |
VALIDATE PASSWORD PLUGIN can be used to test passwords and improve security. It checks the strength of password and allows the users to set only those passwords which are secure enough. Would you like to setup VALIDATE PASSWORD plugin? Press y|Y for Yes, any other key for No: <strong>Y</strong> |
|
0 1 2 3 4 5 6 |
There are three levels of password validation policy: LOW Length >= 8 MEDIUM Length >= 8, numeric, mixed case, and special characters STRONG Length >= 8, numeric, mixed case, special characters and dictionary file Please enter 0 = LOW, 1 = MEDIUM and 2 = STRONG: 1 |
|
0 1 2 3 4 5 6 7 8 9 10 |
Estimated strength of the password: 100 Change the password for root ? ((Press y|Y for Yes, any other key for No) : <strong>N</strong> ... skipping. By default, a MySQL installation has an anonymous user, allowing anyone to log into MySQL without having to have a user account created for them. This is intended only for testing, and to make the installation go a bit smoother. You should remove them before moving into a production environment. |
|
0 1 2 |
Remove anonymous users? (Press y|Y for Yes, any other key for No) : Y Success. |
|
0 1 2 3 4 5 6 7 8 9 10 |
Normally, root should only be allowed to connect from 'localhost'. This ensures that someone cannot guess at the root password from the network. Disallow root login remotely? (Press y|Y for Yes, any other key for No) : Y By default, MySQL comes with a database named 'test' that anyone can access. This is also intended only for testing, and should be removed before moving into a production environment. |
|
0 1 2 3 4 5 6 7 8 9 |
Remove test database and access to it? (Press y|Y for Yes, any other key for No) : Y - Dropping test database... Success. - Removing privileges on test database... Success. Reloading the privilege tables will ensure that all changes made so far will take effect immediately. |
|
0 1 2 3 4 |
Reload privilege tables now? (Press y|Y for Yes, any other key for No) : Y Success. All done! |
INSTALLAZIONE PHP
Installiamo il PHP 7 ed i moduli di Apache
|
0 |
sudo apt-get install php libapache2-mod-php |
Ora installare tutte le estensioni php richieste da teampass con il comando
|
0 |
sudo apt-get install php-mcrypt php-curl php-mysql php-opcache php-mbstring php-ldap php-bcmath php-gd php-xml php-common php-mysqlnd |
Verifichiamo la versione PHP con il comando
|
0 |
php -v |
Dovremmo leggere le seguenti righe
|
0 1 2 3 |
PHP 7.0.22-0ubuntu0.16.04.1 (cli) ( NTS ) Copyright (c) 1997-2017 The PHP Group Zend Engine v3.0.0, Copyright (c) 1998-2017 Zend Technologies with Zend OPcache v7.0.22-0ubuntu0.16.04.1, Copyright (c) 1999-2017, by Zend Technologies |
CREAZIONE DATABASE IN MYSQL
Procedere alla creazione del database con relativa utenza per Teampass
|
0 |
mysql -u root -p |
Creaimo il database con il comando:
|
0 |
create database teampass; |
Se è tutto OK dovremmo leggere le seguenti righe:
Query OK, 1 row affected (0,00 sec)
Creaimo l’utenza con relativa password:
|
0 |
grant all privileges on teampass.* to teampassuser@localhost identified by 'PASSWORD-USER'; |
Al posto di PASSWORD-USER inserire la password desiderata
Se è tutto OK dovremmo leggere la seguente riga:
Query OK, 0 rows affected, 1 warning (0,00 sec)
Lanciamo quindi il comando:
|
0 |
flush privileges; |
Se è tutto OK dovremmo leggere la seguente riga:
Query OK, 0 rows affected (0,00 sec)
Usciamo dalla configurazione di MySQL con il comando:
|
0 |
quit |
CONFIGURAZIONE DI APACHE PER TEAMPASS
Procediamo al download teampass da github e alla scompattazione nella root folder del webiste in /var/www/html
Posizioniamoci nella cartella /var/www/html con il comando:
|
0 |
cd /var/www/html |
Scarichiamo Teampass con il comando:
|
0 |
sudo wget -q https://github.com/nilsteampassnet/TeamPass/archive/master.zip |
Scompattiamo il file zippato con il comando:
|
0 |
sudo unzip master.zip |
Spostiamo la cartella TeamPass-master in teampass con il comando:
|
0 |
sudo mv TeamPass-master/ teampass |
Quindi cambiamo i permessi con il comando:
|
0 |
sudo chown -R www-data:www-data teampass/ |
Modificare il tempo massimo di esecuzione di PHP portandolo a 120 con il comando:
|
0 |
sudo nano /etc/php/7.0/apache2/php.ini |
Di default il valore dovrebbe essere max_execution_time = 30
Impostiamo quindi la con riga max_execution_time = 120
Riavviamo Apache per applicare le modifiche con il comando:
|
0 |
sudo service apache2 restart |
Creare la Cartella Teampass Key all’interno del path /var/www/html/teampass quindi modificare i permessi e l’owner.
Eseguiamo i tre comandi elencati di seguito:
|
0 1 2 |
sudo mkdir -p /var/www/html/teampass/keys sudo chmod 755 /var/www/html/teampass/keys sudo chown -R www-data:www-data /var/www/html/teampass/keys |
Adesso lanciamo i seguenti comandi per poter installare il software senza problemi:
|
0 1 2 3 4 5 6 7 8 9 10 |
sudo chmod 755 /var/www/html/teampass/install sudo chown -R www-data:www-data /var/www/html/teampass/install sudo chmod 755 /var/www/html/teampass/includes sudo chown -R www-data:www-data /var/www/html/teampass/includes sudo chmod 755 /var/www/html/teampass/files sudo chown -R www-data:www-data /var/www/html/teampass/files sudo chmod 755 /var/www/html/teampass/upload sudo chown -R www-data:www-data /var/www/html/teampass/upload |
INSTALLAZIONE TEAMPASS
Richiamare da un quaisasi browser il link http://IP_SERVER/teampass
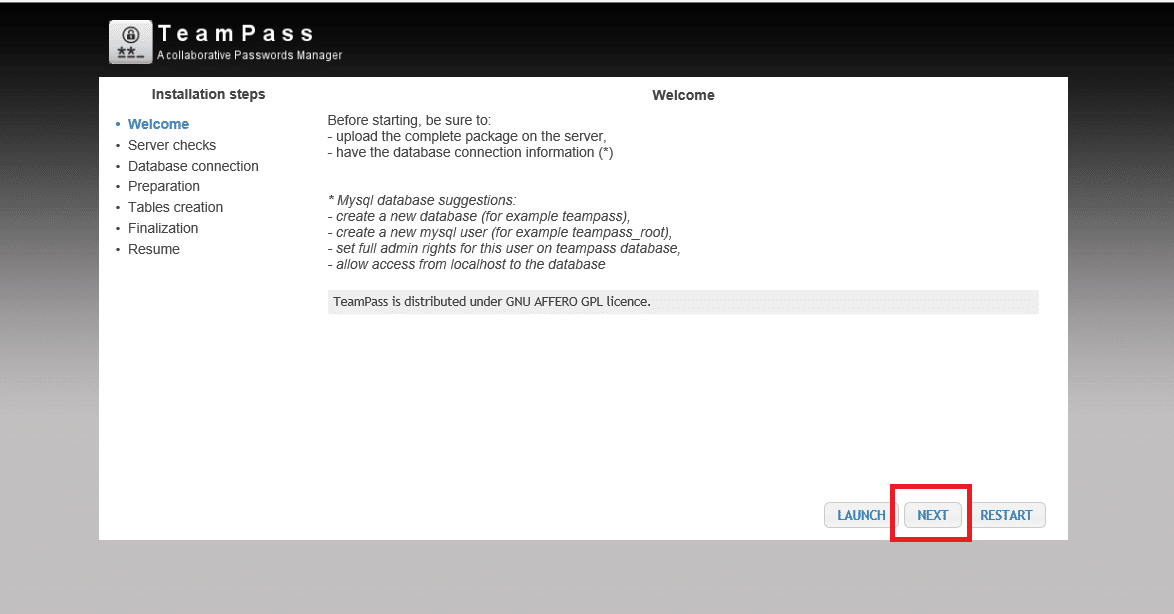
Cliccare Next
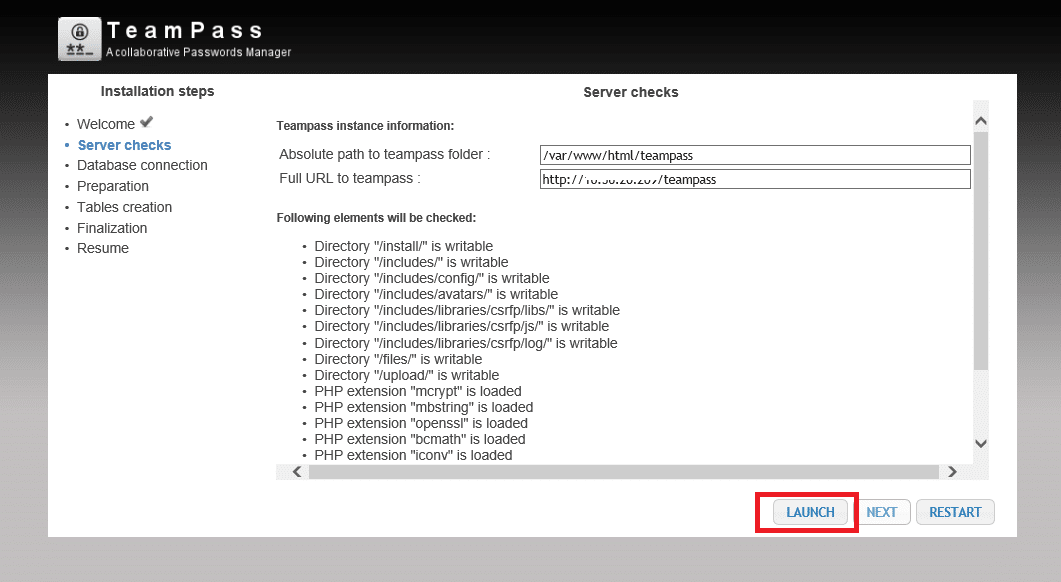
Lasciare tutto inviariato quindi cliccare Launch
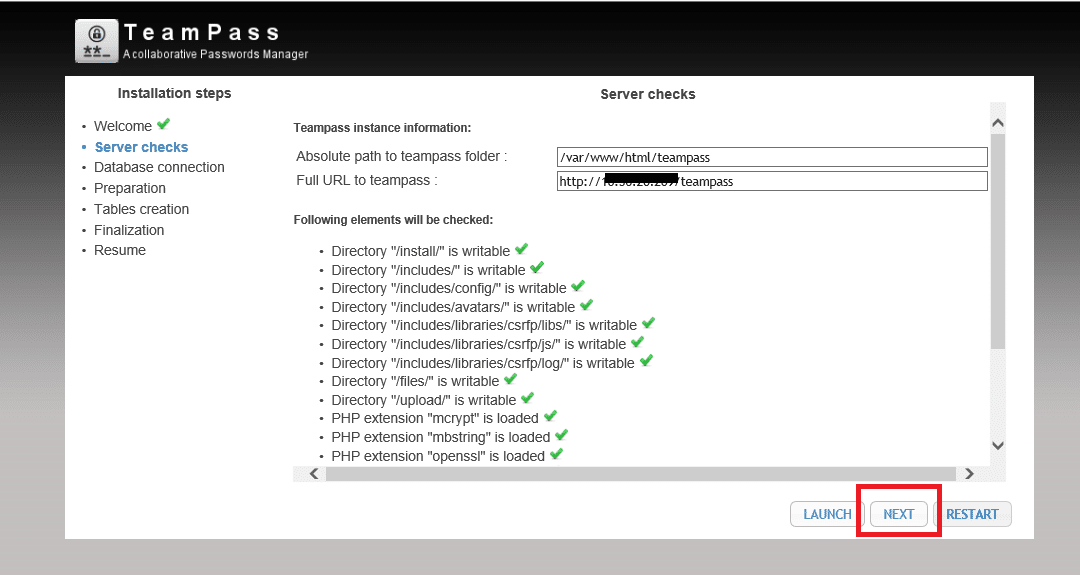
Se non c’è nessun problema dovremmo vedere una schermata come quella sovrastante senza nessun errore.
In caso di errori correggerli e cliccare su Restart per ripetere i controlli lato Server.
Cliccare su Next per procedere con l’installazione
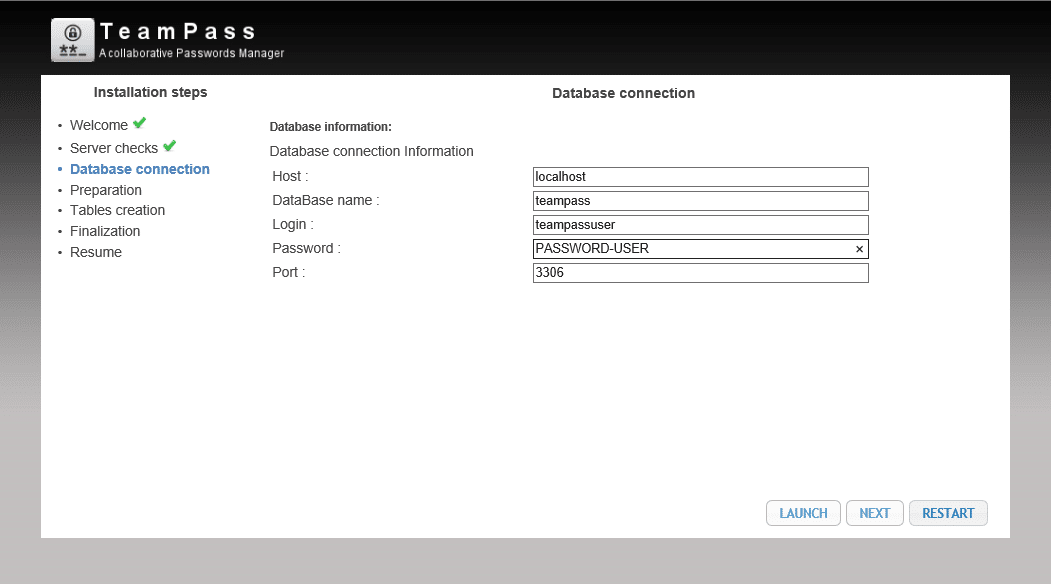
Inserire tutti i dati per la connessione dal database MySQL
Cliccare Launch
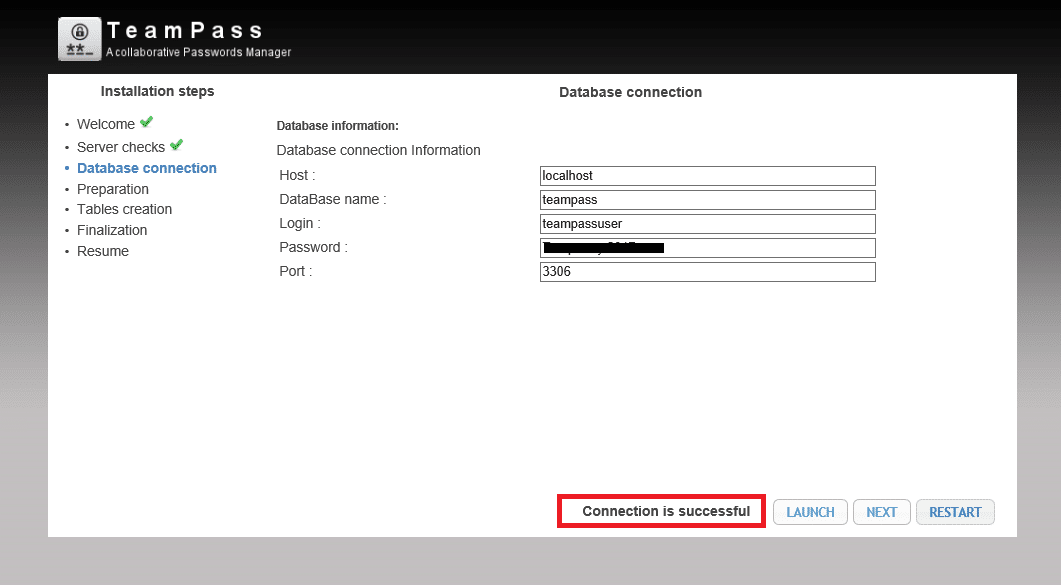
Se è tutto OK dovremmo vedere una schermata come quella sovrastante
Quindi clicchiamo su Next per procedere con l’installazione
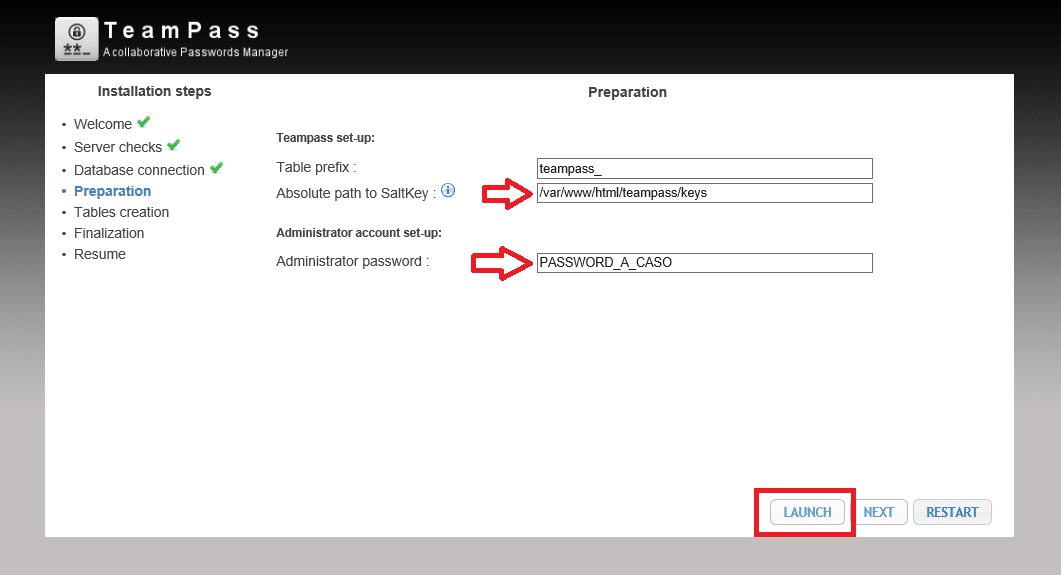
Settare il path per la Saltkey (abbiamo creato la cartella in precedenza) quindi inserire una passowrd per l’Administrator
Cliccare su Launch
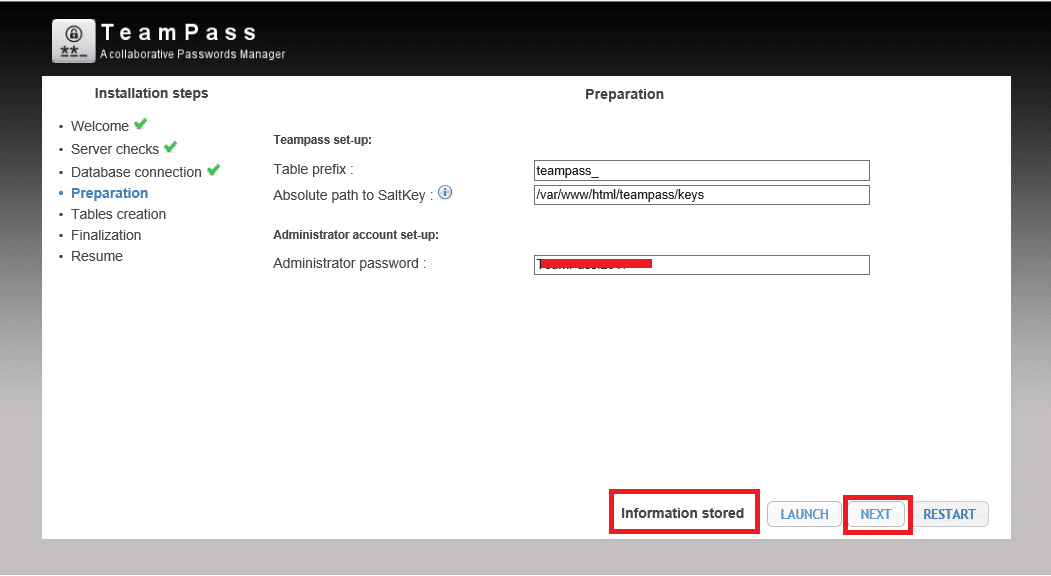
Se è tutto corretto dovremmo vedere una schermata come quella sovrastante.
Clicchiamo su Next per procedere

Cliccare su Launch per iniziare a popoplare il database
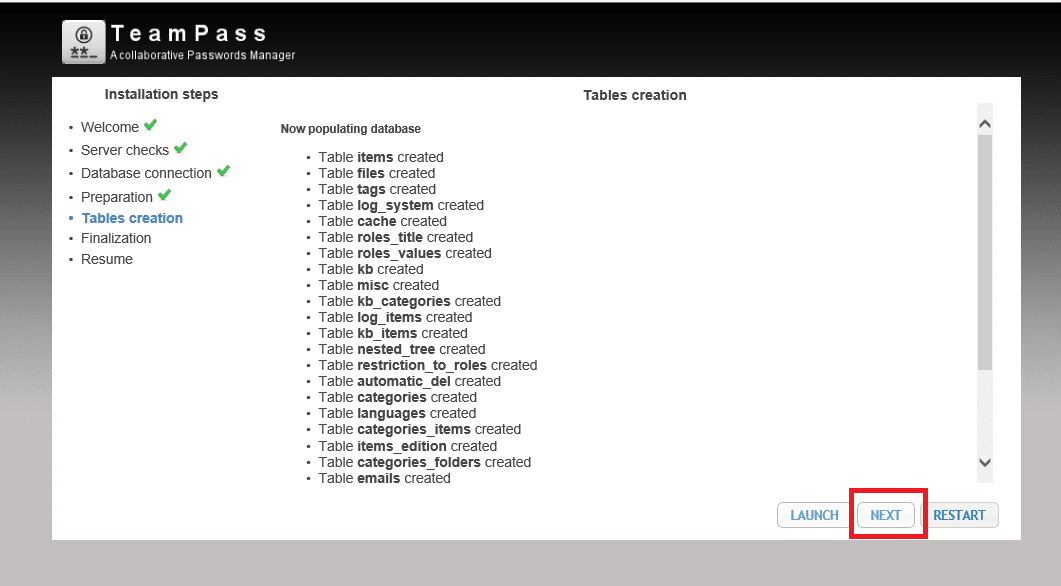
Cliccare su Next per continuare l’installazione
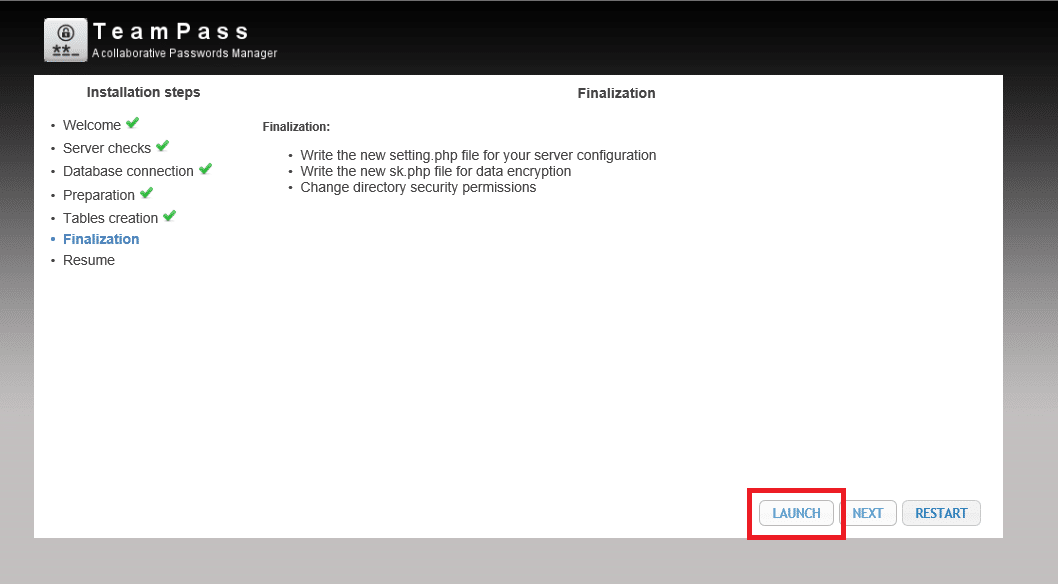
Cliccare su Launch per scrivere tutti i settaggi nei files di configurazione
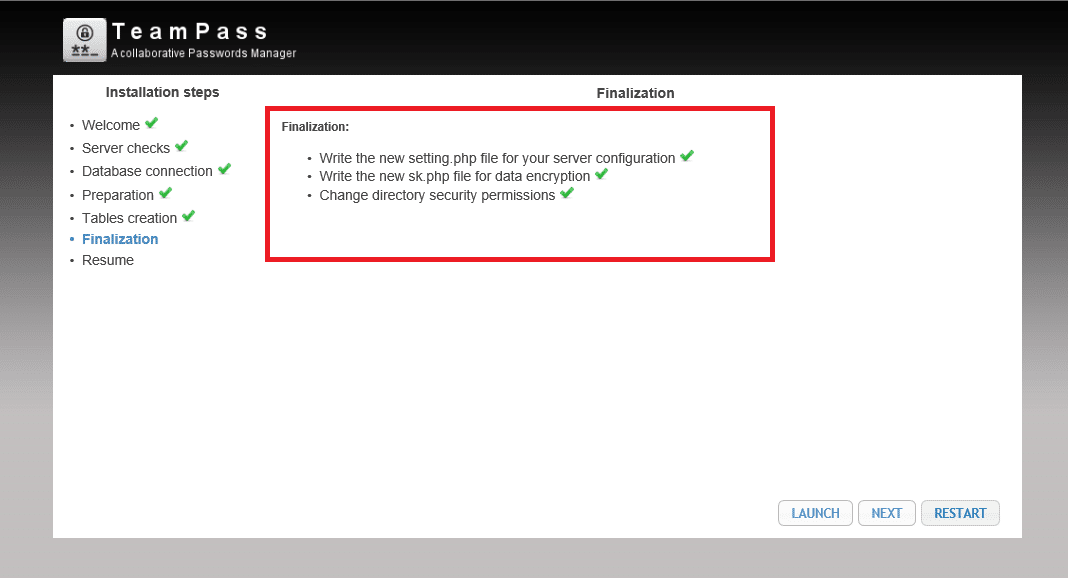
Se è tutto ok dovremmo vedere una schermata come quella sovrastante
Cliccare su Next per procedere
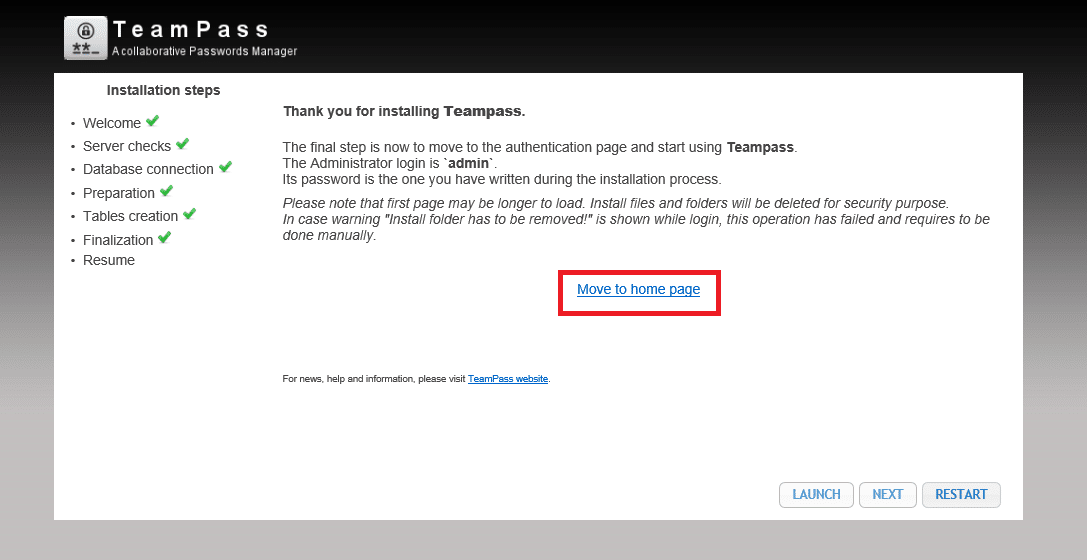
Cliccare su Move to Home Page
ATTENZIONE: Prima di accedere alla pagina web di Teampass collegarsi al server in SSH e verificare se la cartella INSTALL è presente.
Se presente lanciare il seguente comando per cancellare la cartella di installazione:
|
0 |
sudo rmdir install/ |
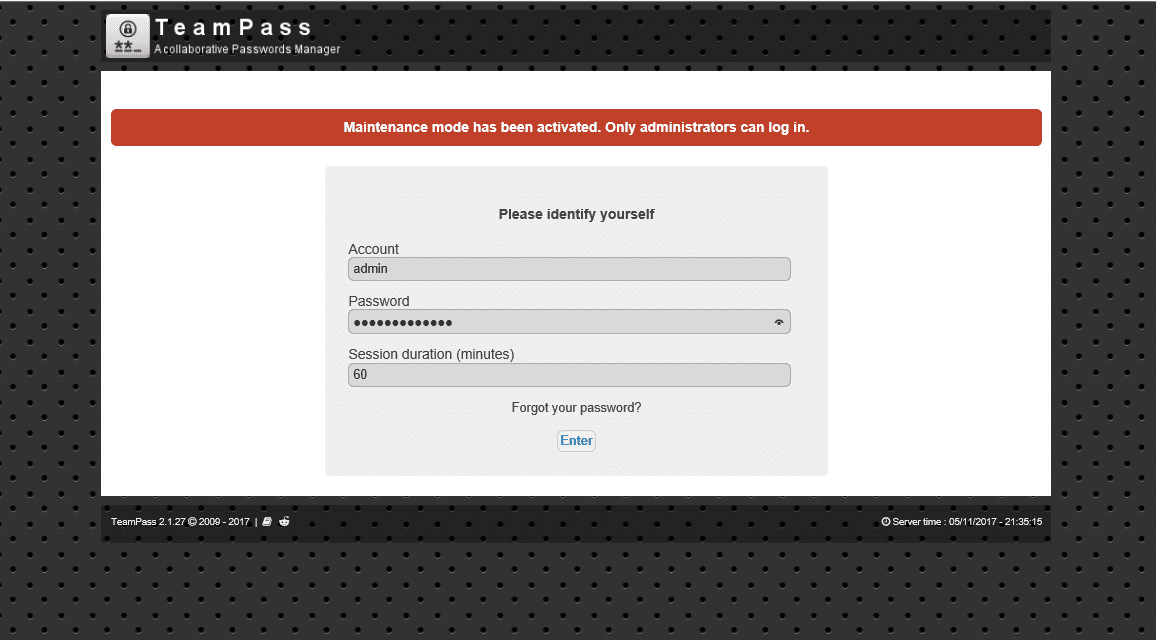
Richiamando il link Http://IP_DEL_SERVER/teampass
Accedere con l’utenza admin e la password settata in precedenza quindi procedere alla configurazione del software.
CONFIGURARE TEAMPASS IN HTTPS
Per la generazione del certifcato lanciare il seguente comando:
|
0 |
sudo openssl req -x509 -nodes -days 365 -newkey rsa:2048 -keyout /etc/ssl/private/apache-selfsigned.key -out /etc/ssl/certs/apache-selfsigned.crt |
NOTA BENE:
openssl: Questo è lo strumento da riga di comando di base per la creazione e la gestione di certificati OpenSSL, chiavi e altri file.
req: Questo sottocomando specifica che vogliamo utilizzare la gestione della richiesta di firma di certificati X.509 (CSR). Il “X.509” è uno standard di infrastruttura chiave pubblica che SSL e TLS aderiscono per la gestione delle chiavi e del certificato. Vogliamo creare un nuovo X.509 cert, quindi stiamo usando questo sottocomando.
-x509: questo modifica ulteriormente il precedente sottocomando dicendo all’utility che vogliamo creare un certificato auto-firmato anziché generare una richiesta di firma del certificato, come accade normalmente.
-nodi: questo indica a OpenSSL di ignorare l’opzione per proteggere il nostro certificato con una passphrase. Abbiamo però bisogno di Apache per poter leggere il file, senza intervento dell’utente, quando il server viene avviato. Una passphrase impedirebbe che questo accada perché dovremmo entrare dopo ogni riavvio.
-days 365: Questa opzione imposta la durata del tempo in cui il certificato sarà considerato valido.
-newkey rsa: 2048: specifica che vogliamo generare un nuovo certificato e una nuova chiave contemporaneamente. Non abbiamo creato la chiave necessaria per firmare il certificato in un passaggio precedente, quindi abbiamo bisogno di crearlo insieme al certificato. La parte di rsa: 2048 gli dice di fare un tasto RSA che sia lungo 2048 bit.
-keyout: questa riga dice a OpenSSL dove posizionare il file di chiave privata generato che stiamo creando.
-out: Questo indica a OpenSSL dove inserire il certificato che stiamo creando.
Rispondere alle domande come riportato di seguito:
|
0 1 2 3 4 5 6 |
Country Name (2 letter code) [AU]:IT State or Province Name (full name) [Some-State]:ITALY Locality Name (eg, city) []:TURIN Organization Name (eg, company) [Internet Widgits Pty Ltd]:COMPANY Organizational Unit Name (eg, section) []:IT Common Name (e.g. server FQDN or YOUR name) []:NOME_DNS_SERVER Email Address []:mail@mailserver.it |
Generare il certificato con il comando ed attendere qualche minuto:
|
0 |
sudo openssl dhparam -out /etc/ssl/certs/dhparam.pem 2048 |
CONFIGURARE APACHE PER L’UTILIZZO DI SSL
Per permettere ad Apache di utilizzare l’SSL creare il seguente file:
|
0 |
sudo nano /etc/apache2/conf-available/ssl-params.conf |
Inseriamo nel file di configurazione le seguenti righe:
|
0 1 2 3 4 5 6 7 8 9 10 11 12 13 14 15 16 17 18 |
# from https://cipherli.st/ # and https://raymii.org/s/tutorials/Strong_SSL_Security_On_Apache2.html SSLCipherSuite EECDH+AESGCM:EDH+AESGCM:AES256+EECDH:AES256+EDH SSLProtocol All -SSLv2 -SSLv3 SSLHonorCipherOrder On # Disable preloading HSTS for now. You can use the commented out header line that includes # the "preload" directive if you understand the implications. #Header always set Strict-Transport-Security "max-age=63072000; includeSubdomains; preload" Header always set Strict-Transport-Security "max-age=63072000; includeSubdomains" Header always set X-Frame-Options DENY Header always set X-Content-Type-Options nosniff # Requires Apache >= 2.4 SSLCompression off SSLSessionTickets Off SSLUseStapling on SSLStaplingCache "shmcb:logs/stapling-cache(150000)" SSLOpenSSLConfCmd DHParameters "/etc/ssl/certs/dhparam.pem" |
Salviamo e chiudiamo il file ssl-params.conf
MODIFICA DEL FILE SSL VIRTUAL HOST SU APACHE
Per sicurezza facciamo una copia del file default-ssl.conf con il comando
|
0 |
sudo cp /etc/apache2/sites-available/default-ssl.conf /etc/apache2/sites-available/default-ssl.conf.bak |
Aprire il file di configurazione con il comando:
|
0 |
sudo nano /etc/apache2/sites-available/default-ssl.conf |
Di seguito il contenuto del file originale.
|
0 1 2 3 4 5 6 7 8 9 10 11 12 13 14 15 16 17 18 19 20 21 22 23 24 25 26 27 28 29 30 31 32 33 34 35 36 37 38 39 40 41 42 43 44 45 46 47 48 49 50 51 52 53 54 55 56 57 58 59 60 61 62 63 64 65 66 67 68 69 70 71 72 73 74 75 76 77 78 79 80 81 82 83 84 85 86 87 88 89 90 91 92 93 94 95 96 97 98 99 100 101 102 103 104 105 106 107 108 109 110 111 112 113 114 115 116 117 118 119 120 121 122 123 124 125 126 127 128 129 130 131 132 133 134 135 136 137 138 139 140 141 142 143 144 145 146 147 148 149 150 151 152 153 154 155 156 157 158 159 160 161 162 163 164 165 166 167 168 169 170 171 172 173 174 175 176 177 178 179 180 181 182 183 184 185 186 187 188 189 190 191 192 193 194 195 196 197 198 199 200 201 202 203 204 205 206 207 208 209 210 211 212 213 214 215 216 217 218 219 220 221 222 223 224 |
<IfModule mod_ssl.c> <VirtualHost _default_:443> ServerAdmin webmaster@localhost DocumentRoot /var/www/html # Available loglevels: trace8, ..., trace1, debug, info, notice, warn, # error, crit, alert, emerg. # It is also possible to configure the loglevel for particular # modules, e.g. #LogLevel info ssl:warn ErrorLog ${APACHE_LOG_DIR}/error.log CustomLog ${APACHE_LOG_DIR}/access.log combined # For most configuration files from conf-available/, which are # enabled or disabled at a global level, it is possible to # include a line for only one particular virtual host. For example the # following line enables the CGI configuration for this host only # after it has been globally disabled with "a2disconf". #Include conf-available/serve-cgi-bin.conf # SSL Engine Switch: # Enable/Disable SSL for this virtual host. SSLEngine on # A self-signed (snakeoil) certificate can be created by installing # the ssl-cert package. See # /usr/share/doc/apache2/README.Debian.gz for more info. # If both key and certificate are stored in the same file, only the # SSLCertificateFile directive is needed. SSLCertificateFile /etc/ssl/certs/ssl-cert-snakeoil.pem SSLCertificateKeyFile /etc/ssl/private/ssl-cert-snakeoil.key # Server Certificate Chain: # Point SSLCertificateChainFile at a file containing the # concatenation of PEM encoded CA certificates which form the # certificate chain for the server certificate. Alternatively # the referenced file can be the same as SSLCertificateFile # when the CA certificates are directly appended to the server # certificate for convinience. #SSLCertificateChainFile /etc/apache2/ssl.crt/server-ca.crt # Certificate Authority (CA): # Set the CA certificate verification path where to find CA # certificates for client authentication or alternatively one # huge file containing all of them (file must be PEM encoded) # Note: Inside SSLCACertificatePath you need hash symlinks # to point to the certificate files. Use the provided # Makefile to update the hash symlinks after changes. #SSLCACertificatePath /etc/ssl/certs/ #SSLCACertificateFile /etc/apache2/ssl.crt/ca-bundle.crt # Certificate Revocation Lists (CRL): # Set the CA revocation path where to find CA CRLs for client # authentication or alternatively one huge file containing all # of them (file must be PEM encoded) # Note: Inside SSLCARevocationPath you need hash symlinks # to point to the certificate files. Use the provided # Makefile to update the hash symlinks after changes. #SSLCARevocationPath /etc/apache2/ssl.crl/ #SSLCARevocationFile /etc/apache2/ssl.crl/ca-bundle.crl # Client Authentication (Type): # Server Certificate Chain: # Point SSLCertificateChainFile at a file containing the # concatenation of PEM encoded CA certificates which form the # certificate chain for the server certificate. Alternatively # the referenced file can be the same as SSLCertificateFile # when the CA certificates are directly appended to the server # certificate for convinience. #SSLCertificateChainFile /etc/apache2/ssl.crt/server-ca.crt # Certificate Authority (CA): # Set the CA certificate verification path where to find CA # certificates for client authentication or alternatively one # huge file containing all of them (file must be PEM encoded) # Note: Inside SSLCACertificatePath you need hash symlinks # to point to the certificate files. Use the provided # Makefile to update the hash symlinks after changes. #SSLCACertificatePath /etc/ssl/certs/ #SSLCACertificateFile /etc/apache2/ssl.crt/ca-bundle.crt # Certificate Revocation Lists (CRL): # Set the CA revocation path where to find CA CRLs for client # authentication or alternatively one huge file containing all # of them (file must be PEM encoded) # Note: Inside SSLCARevocationPath you need hash symlinks # to point to the certificate files. Use the provided # Makefile to update the hash symlinks after changes. #SSLCARevocationPath /etc/apache2/ssl.crl/ #SSLCARevocationFile /etc/apache2/ssl.crl/ca-bundle.crl # Client Authentication (Type): # Client certificate verification type and depth. Types are # none, optional, require and optional_no_ca. Depth is a # number which specifies how deeply to verify the certificate # issuer chain before deciding the certificate is not valid. #SSLVerifyClient require #SSLVerifyDepth 10 # SSL Engine Options: # Set various options for the SSL engine. # o FakeBasicAuth: # Translate the client X.509 into a Basic Authorisation. This means that # the standard Auth/DBMAuth methods can be used for access control. The # user name is the `one line' version of the client's X.509 certificate. # Note that no password is obtained from the user. Every entry in the user # file needs this password: `xxj31ZMTZzkVA'. # o ExportCertData: # This exports two additional environment variables: SSL_CLIENT_CERT and # SSL_SERVER_CERT. These contain the PEM-encoded certificates of the # server (always existing) and the client (only existing when client # authentication is used). This can be used to import the certificates # into CGI scripts. # o StdEnvVars: # This exports the standard SSL/TLS related `SSL_*' environment variables. # Per default this exportation is switched off for performance reasons, # because the extraction step is an expensive operation and is usually # useless for serving static content. So one usually enables the # exportation for CGI and SSI requests only. # o OptRenegotiate: # This enables optimized SSL connection renegotiation handling when SSL # directives are used in per-directory context. #SSLOptions +FakeBasicAuth +ExportCertData +StrictRequire <FilesMatch "\.(cgi|shtml|phtml|php)$"> SSLOptions +StdEnvVars # number which specifies how deeply to verify the certificate # issuer chain before deciding the certificate is not valid. #SSLVerifyClient require #SSLVerifyDepth 10 # SSL Engine Options: # Set various options for the SSL engine. # o FakeBasicAuth: # Translate the client X.509 into a Basic Authorisation. This means that # the standard Auth/DBMAuth methods can be used for access control. The # user name is the `one line' version of the client's X.509 certificate. # Note that no password is obtained from the user. Every entry in the user # file needs this password: `xxj31ZMTZzkVA'. # o ExportCertData: # This exports two additional environment variables: SSL_CLIENT_CERT and # SSL_SERVER_CERT. These contain the PEM-encoded certificates of the # server (always existing) and the client (only existing when client # authentication is used). This can be used to import the certificates # into CGI scripts. # o StdEnvVars: # This exports the standard SSL/TLS related `SSL_*' environment variables. # Per default this exportation is switched off for performance reasons, # because the extraction step is an expensive operation and is usually # useless for serving static content. So one usually enables the # exportation for CGI and SSI requests only. # o OptRenegotiate: # This enables optimized SSL connection renegotiation handling when SSL # directives are used in per-directory context. #SSLOptions +FakeBasicAuth +ExportCertData +StrictRequire <FilesMatch "\.(cgi|shtml|phtml|php)$"> SSLOptions +StdEnvVars </FilesMatch> <Directory /usr/lib/cgi-bin> SSLOptions +StdEnvVars </Directory> # SSL Protocol Adjustments: # The safe and default but still SSL/TLS standard compliant shutdown # approach is that mod_ssl sends the close notify alert but doesn't wait for # the close notify alert from client. When you need a different shutdown # approach you can use one of the following variables: # o ssl-unclean-shutdown: # This forces an unclean shutdown when the connection is closed, i.e. no # SSL close notify alert is send or allowed to received. This violates # the SSL/TLS standard but is needed for some brain-dead browsers. Use # this when you receive I/O errors because of the standard approach where # mod_ssl sends the close notify alert. # o ssl-accurate-shutdown: # This forces an accurate shutdown when the connection is closed, i.e. a # SSL close notify alert is send and mod_ssl waits for the close notify # alert of the client. This is 100% SSL/TLS standard compliant, but in # practice often causes hanging connections with brain-dead browsers. Use # this only for browsers where you know that their SSL implementation # works correctly. # Notice: Most problems of broken clients are also related to the HTTP # keep-alive facility, so you usually additionally want to disable # keep-alive for those clients, too. Use variable "nokeepalive" for this. # Similarly, one has to force some clients to use HTTP/1.0 to workaround # their broken HTTP/1.1 implementation. Use variables "downgrade-1.0" and # "force-response-1.0" for this. # BrowserMatch "MSIE [2-6]" \ # nokeepalive ssl-unclean-shutdown \ # downgrade-1.0 force-response-1.0 SSLOptions +StdEnvVars </Directory> # SSL Protocol Adjustments: # The safe and default but still SSL/TLS standard compliant shutdown # approach is that mod_ssl sends the close notify alert but doesn't wait for # the close notify alert from client. When you need a different shutdown # approach you can use one of the following variables: # o ssl-unclean-shutdown: # This forces an unclean shutdown when the connection is closed, i.e. no # SSL close notify alert is send or allowed to received. This violates # the SSL/TLS standard but is needed for some brain-dead browsers. Use # this when you receive I/O errors because of the standard approach where # mod_ssl sends the close notify alert. # o ssl-accurate-shutdown: # This forces an accurate shutdown when the connection is closed, i.e. a # SSL close notify alert is send and mod_ssl waits for the close notify # alert of the client. This is 100% SSL/TLS standard compliant, but in # practice often causes hanging connections with brain-dead browsers. Use # this only for browsers where you know that their SSL implementation # works correctly. # Notice: Most problems of broken clients are also related to the HTTP # keep-alive facility, so you usually additionally want to disable # keep-alive for those clients, too. Use variable "nokeepalive" for this. # Similarly, one has to force some clients to use HTTP/1.0 to workaround # their broken HTTP/1.1 implementation. Use variables "downgrade-1.0" and # "force-response-1.0" for this. # BrowserMatch "MSIE [2-6]" \ # nokeepalive ssl-unclean-shutdown \ # downgrade-1.0 force-response-1.0 </VirtualHost> </IfModule> |
Le righe da modificare sono le seguenti:
<IfModule mod_ssl.c>
<VirtualHost _default_:443>
ServerAdmin [email protected]
ServerName nome_del_server_o_indirizzo_IP
DocumentRoot /var/www/html
# Available loglevels: trace8, …, trace1, debug, info, notice, warn,
# error, crit, alert, emerg.
# It is also possible to configure the loglevel for particular
# modules, e.g.
#LogLevel info ssl:warn
ErrorLog ${APACHE_LOG_DIR}/error.log
CustomLog ${APACHE_LOG_DIR}/access.log combined
# For most configuration files from conf-available/, which are
# enabled or disabled at a global level, it is possible to
# include a line for only one particular virtual host. For example the
# following line enables the CGI configuration for this host only
# after it has been globally disabled with “a2disconf”.
#Include conf-available/serve-cgi-bin.conf
# SSL Engine Switch:
# Enable/Disable SSL for this virtual host.
SSLEngine on
# A self-signed (snakeoil) certificate can be created by installing
# the ssl-cert package. See
# /usr/share/doc/apache2/README.Debian.gz for more info.
# If both key and certificate are stored in the same file, only the
# SSLCertificateFile directive is needed.
SSLCertificateFile /etc/ssl/certs/apache-selfsigned.crt
SSLCertificateKeyFile /etc/ssl/private/apache-selfsigned.key
Quindi decommentare le seguenti righe (sono al fondo del file di configurazione):
BrowserMatch “MSIE [2-6]” \
nokeepalive ssl-unclean-shutdown \
downgrade-1.0 force-response-1.0
Salvare il file e chiuderlo
Apriamo il file di configurazione 000-default.conf per impostare il redirect in HTTPS
|
0 |
sudo nano /etc/apache2/sites-available/000-default.conf |
Inserire all’interno del VirtualHost la riga sul redirect
|
0 |
Redirect "/" "https://NOME_SERVER_O_IP_ADDRESS/" |

Dovremmo vedere una schermata come quella sovrastante
Salvare e chiudere il file di configurazione
ABILITARE LE MODIFICHE IN APACHE
Lanciamo i seguenti comandi in sequenza:
|
0 1 2 3 4 5 6 7 8 |
sudo a2enmod ssl sudo a2enmod headers sudo a2ensite default-ssl sudo a2enconf ssl-params sudo apache2ctl configtest |
Riavviamo Apache per applicare le modifiche
|
0 |
sudo systemctl restart apache2 |
Adesso se proviamo a richiamare il nostro teampass con il link
https://IP_SERVER/teampass
Dovrebbe risponderci il teampass
A questo punto possiamo impostare il Redirect permanente e quindi consentendo solo il traffico crittografato.
Per fare questo dobbiamo modificare nuovamente l’host virtuale apache non crittografato per rendere permanente il reindirizzamento.
Apriamo il file sudo nano 000-default.conf con il comando
|
0 |
sudo nano /etc/apache2/sites-available/000-default.conf |
Modifichiamo la riga creata in precedenza aggiungendo “permanent”
Redirect permanent “/” “https://NOME_SERVER_O_IP_ADDRESS/”
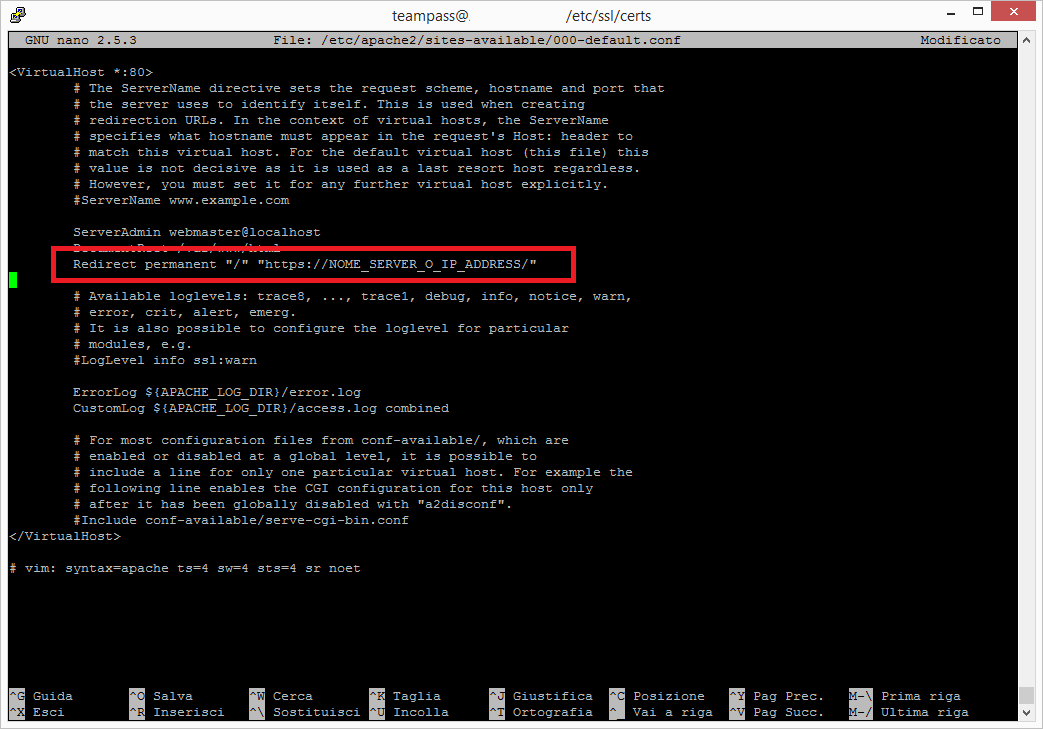
Se è tutto corretto dovremmo vedere una schermata come quella sovrastante
Salvare e chiudere il file
Testiamo quindi la configurazione di Apache con il comando:
|
0 |
sudo apache2ctl configtest |
Se è tutto ok dovremmo ricevere il messaggio Syntax OK
Riavviamo Apache per applicare le modifiche:
|
0 |
sudo systemctl restart apache2 |
Adesso se proviamo a richiamare il sito in http vedremo che andarà in automatico in https.


0 commenti