


Questo articolo mostra come installare il server DNS PowerDNS con backend MySQL su un Raspberry PI 2
PowerDNS è un server dei nomi autorevole e ad alte prestazioni, nella configurazione descritta qui leggerà i record DNS da un database MySQL (simile a MyDNS), sebbene siano supportati anche altri backend come PostgreSQL.
PRE-REQUISITI
In questo esempio utilizzo un Raspberry PI 2 con il nome host RASPBERRY-DNS.local e l’indirizzo IP 192.168.100.180
Settare permanentemente Nome e FQDN del nostro Raspberry Leggi Articolo
Aggiornare il sistema con il comando:
|
0 |
sudo apt-get update && sudo apt-get upgrade -y
|
Installare le utility DNS con il comando:
|
0 |
sudo apt-get install dnsutils
|
INSTALLAZIONE DI MYSQL
Lanciare il comando
|
0 |
apt-get install mysql-server mysql-client
|
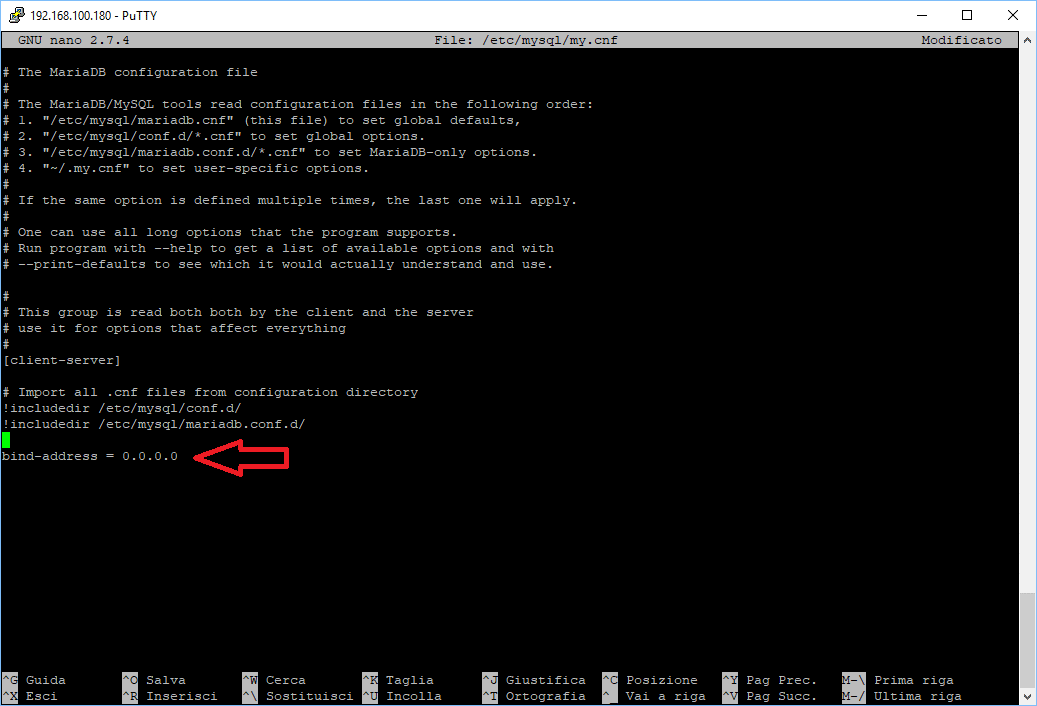
NOTA BENE: Se vogliamo fare in modo che MySQL ascolti su tutte le interfacce (questo è importante per la replica del database MySQL) e non solo su localhost, modifichiamo il file /etc/mysql/my.cnf e commentiamo la riga bind-address = 127.0.0.1
Lanciamo quindi il comando
|
0 |
sudo nano /etc/mysql/my.cnf
|
Aggiungere la riga al fondo del file di configurazione
|
0
1
|
[mysqld]
bind-address = 0.0.0.0
|
Di seguito il fle di configurazione completo:
|
0
1
2
3
4
5
6
7
8
9
10
11
12
13
14
15
16
17
18
19
20
21
22
23
24
25
|
# The MariaDB configuration file
#
# The MariaDB/MySQL tools read configuration files in the following order:
# 1. "/etc/mysql/mariadb.cnf" (this file) to set global defaults,
# 2. "/etc/mysql/conf.d/*.cnf" to set global options.
# 3. "/etc/mysql/mariadb.conf.d/*.cnf" to set MariaDB-only options.
# 4. "~/.my.cnf" to set user-specific options.
#
# If the same option is defined multiple times, the last one will apply.
#
# One can use all long options that the program supports.
# Run program with --help to get a list of available options and with
# --print-defaults to see which it would actually understand and use.
#
# This group is read both both by the client and the server
# use it for options that affect everything
#
[client-server]
# Import all .cnf files from configuration directory
!includedir /etc/mysql/conf.d/
!includedir /etc/mysql/mariadb.conf.d/
[mysqld]
bind-address = 0.0.0.0
|
Riavviare il mySQL con il comando
|
0 |
sudo service mysql restart
|
Lanciare quindi il seguente comando per verificare
|
0 |
netstat -tap | grep mysql
|
Se è tutto corretto dovremmo vedere:
|
0 |
tcp 0 0 0.0.0.0:mysql 0.0.0.0:* LISTEN 1168/mysqld
|
INSTALLAZIONE DI POWERDNS
Per installare PowerDNS lanciamo il seguente comando:
|
0 |
apt-get install pdns-server pdns-backend-mysql
|
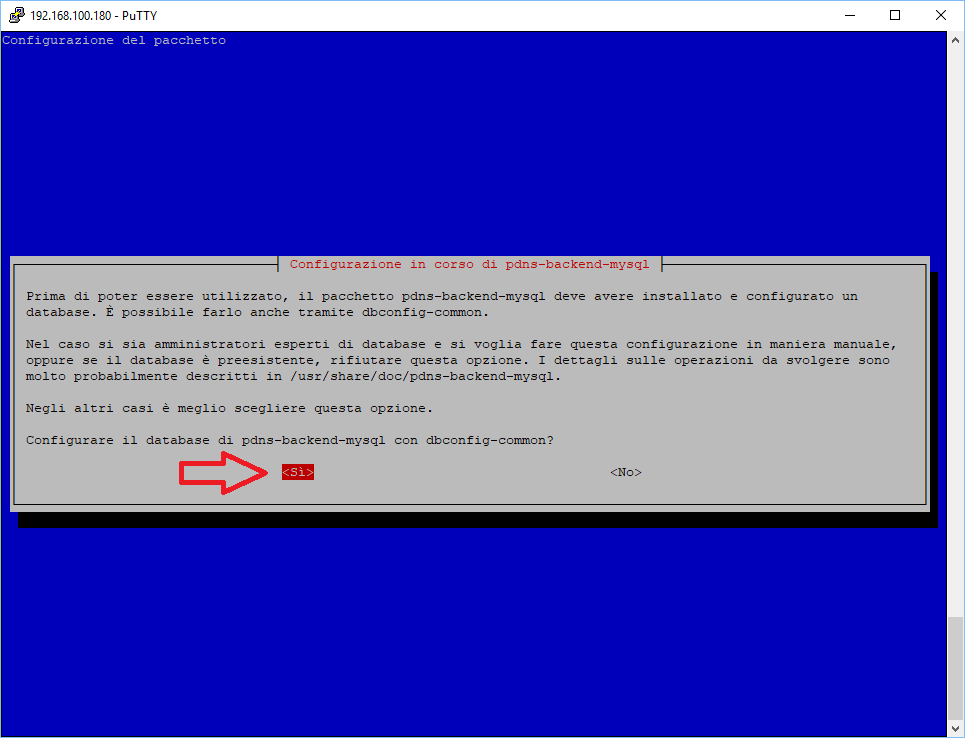
Cliccare su Si
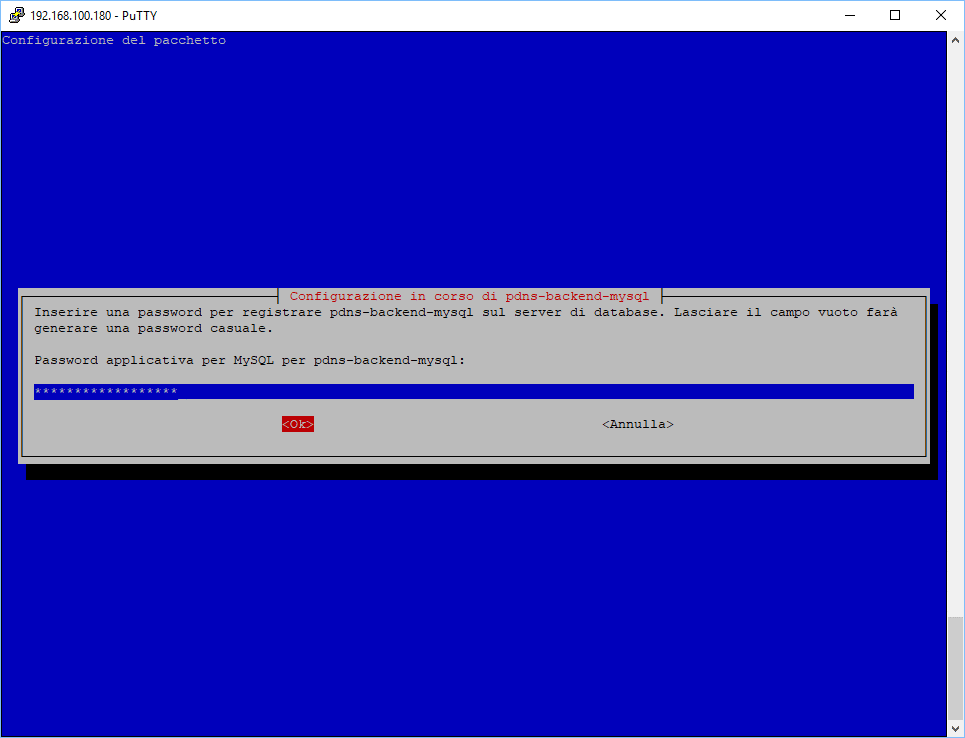
Inserire la password dell’utente amministrativo quindi cliccare OK
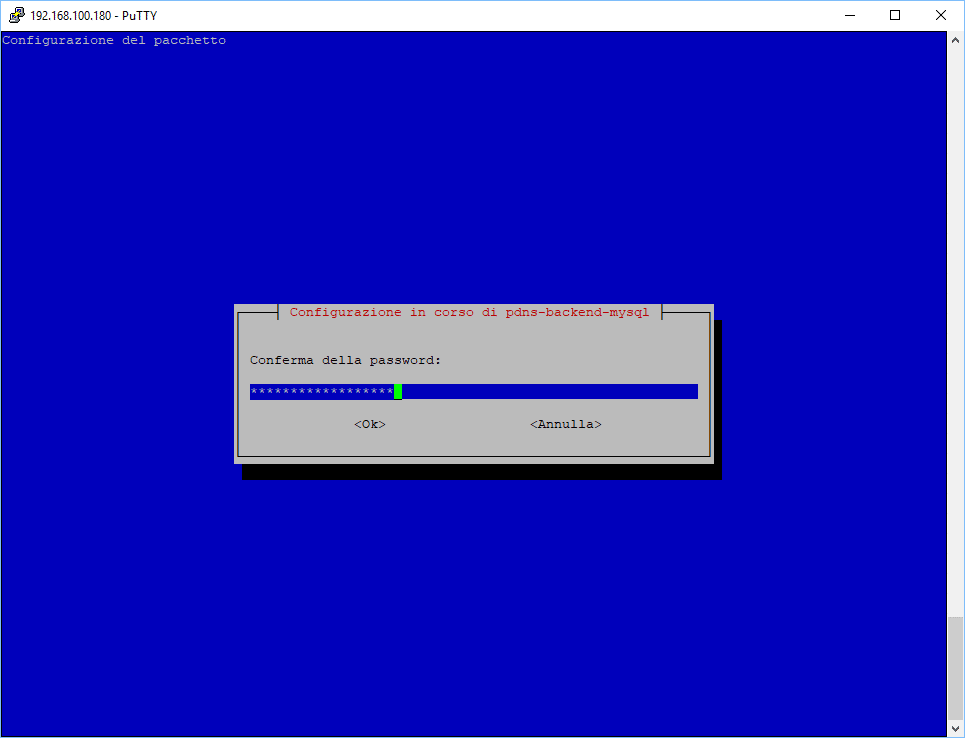
Confermare la password quindi cliccare OK
NOTA BENE: Il file di configurazione di PowerDNS è presente nella seguente cartella /etc/powerdns
CONFIGURAZIONE DI MYSQL
Adesso colleghiamoci al MySQL con il comando:
|
0 |
sudo mysql -u root -p
|
Inserire quindi la password dell’utente root.
A questo punto dalla shell di MySQL creare il database per PowerDNS con il comando:
|
0 |
CREATE DATABASE powerdns; |
Dovremmo leggere la seguente stringa
|
0 |
Query OK, 1 row affected (0.00 sec) |
Adesso creiamo l’utente MySQl per il database di PowerDNS con il comando:
|
0 |
GRANT ALL ON powerdns.* TO 'poweruser'@'localhost' IDENTIFIED BY 'password_poweruser'; |
NOTE:
powerdns = è il nome del database
poweruser = è l’utente per l’accesso al database
password_poweruser = è la password del poweruser
dovremmo vedere la seguente stringa
|
0 |
Query OK, 0 rows affected (0.00 sec) |
in ultimo applichiamo i permessi con il comando:
|
0 |
FLUSH PRIVILEGES; |
Se è tutto Ok dovremmo vedere la stringa
|
0 |
Query OK, 0 rows affected (0.00 sec) |
Ora creiamo le tabelle necessarie a PowerDNS spostandoci sul database corretto con il comando:
|
0 |
USE powerdns; |
Copiare tutte le righe seguenti quindi dare INVIO
|
0
1
2
3
4
5
6
7
8
9
|
CREATE TABLE domains (
id INT auto_increment,
name VARCHAR(255) NOT NULL,
master VARCHAR(128) DEFAULT NULL,
last_check INT DEFAULT NULL,
type VARCHAR(6) NOT NULL,
notified_serial INT DEFAULT NULL,
account VARCHAR(40) DEFAULT NULL,
primary key (id)
);
|
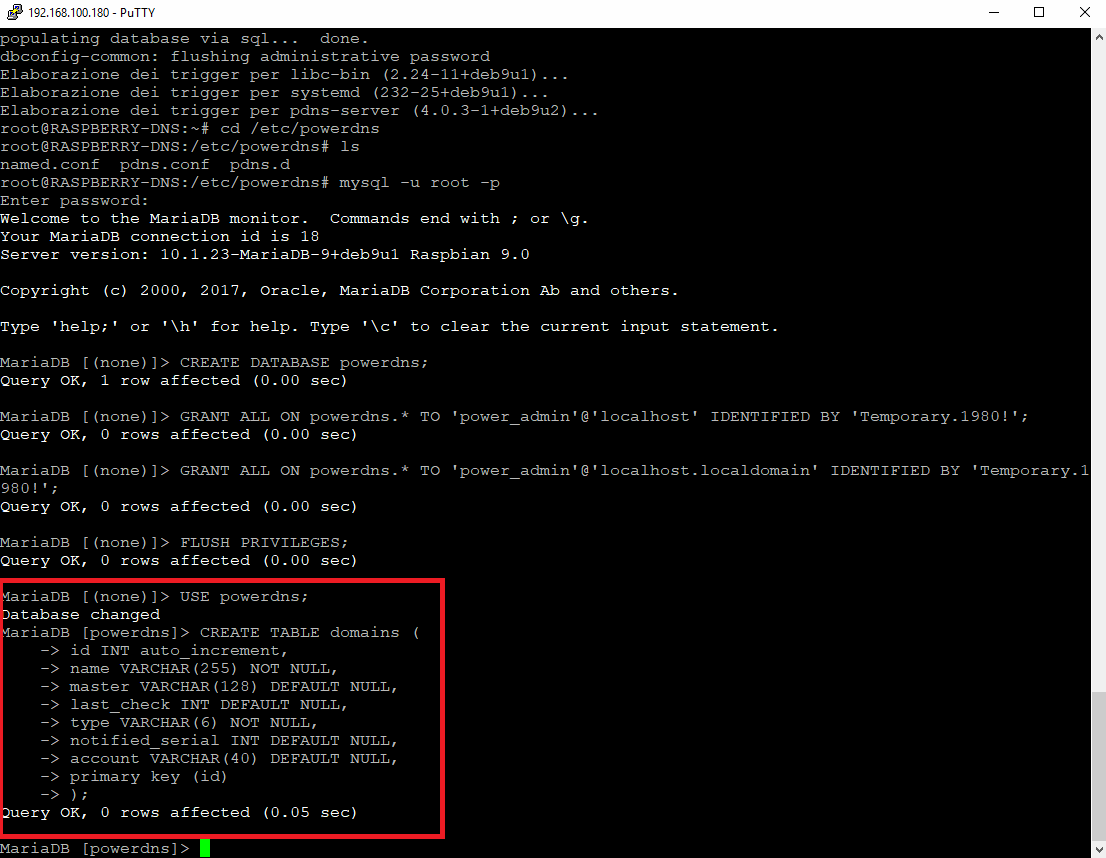
Se è tutto Ok dovremmo vedere una schermata come quella sovrastante
Lanciamo quindi il comando:
|
0 |
CREATE UNIQUE INDEX name_index ON domains(name); |
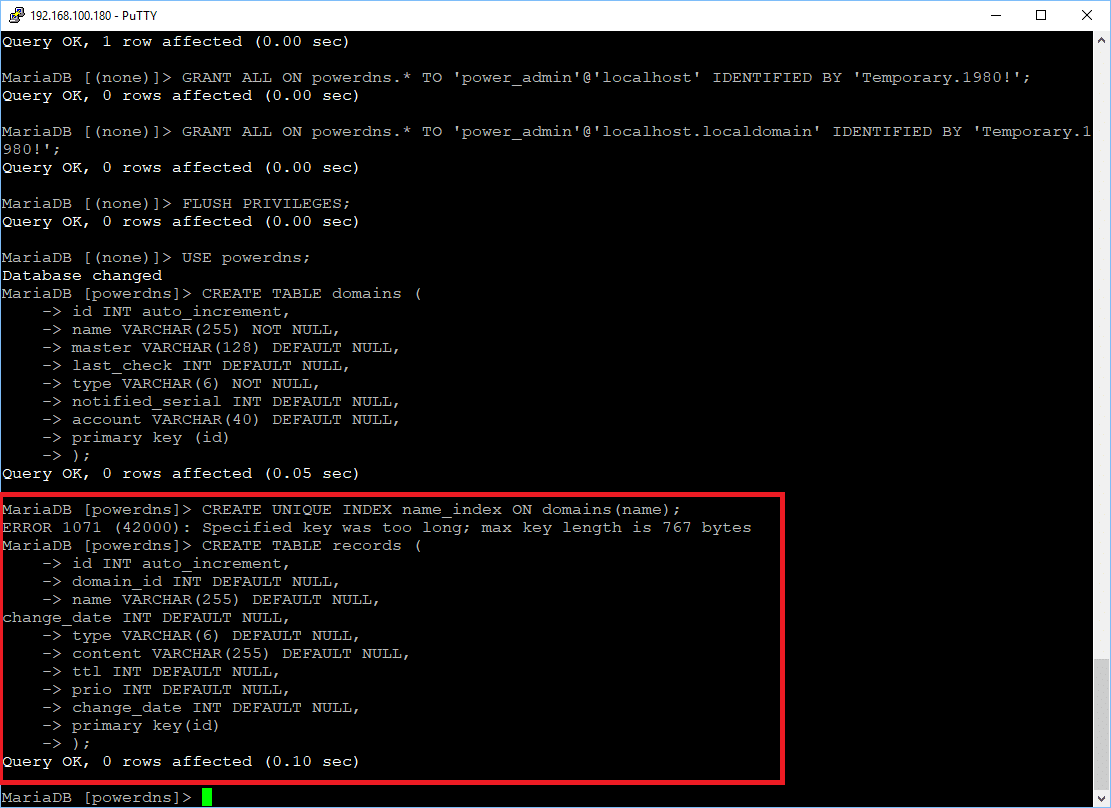
Copiare tutte le righe seguenti quindi dare INVIO
|
0
1
2
3
4
5
6
7
8
9
10
|
CREATE TABLE records (
id INT auto_increment,
domain_id INT DEFAULT NULL,
name VARCHAR(255) DEFAULT NULL,
type VARCHAR(6) DEFAULT NULL,
content VARCHAR(255) DEFAULT NULL,
ttl INT DEFAULT NULL,
prio INT DEFAULT NULL,
change_date INT DEFAULT NULL,
primary key(id)
);
|
Se è tutto Ok dovremmo vedere una schermata come quella sovrastante
Lanciamo i comandi di seguito elencati uno per volta:
|
0
1
2
|
CREATE INDEX rec_name_index ON records(name);
CREATE INDEX nametype_index ON records(name,type);
CREATE INDEX domain_id ON records(domain_id);
|
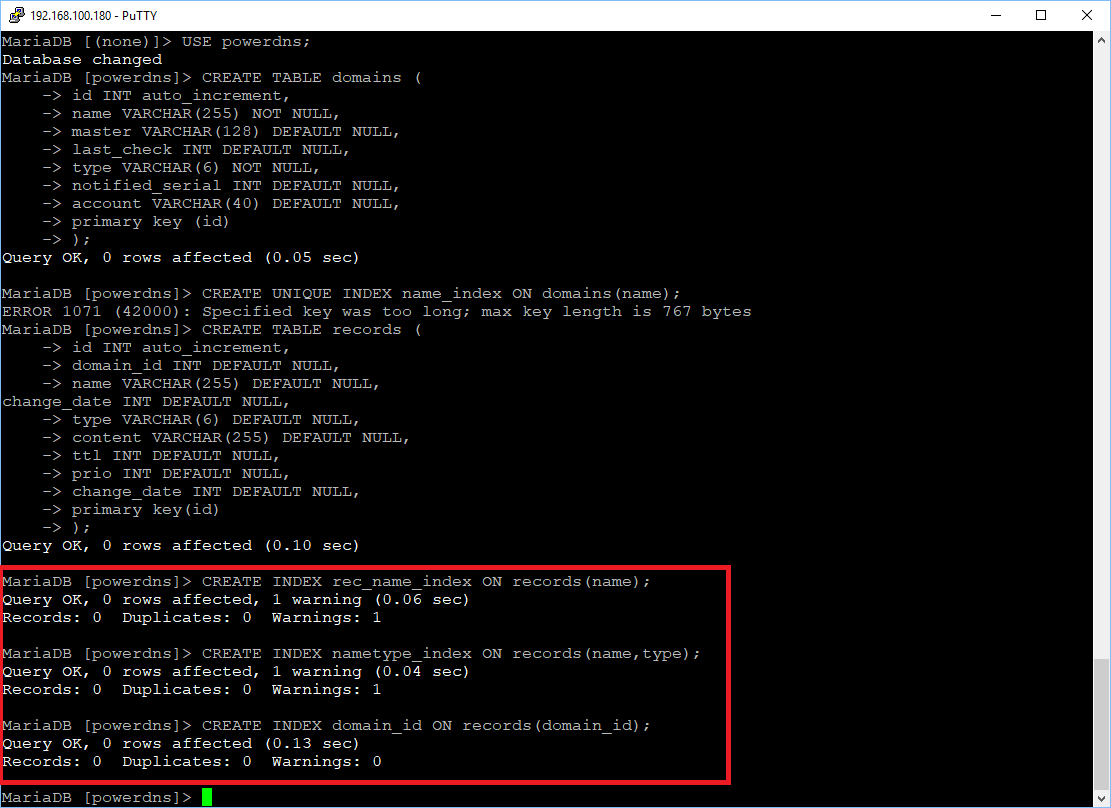
Se è tutto Ok dovremmo vedere una schermata come quella sovrastante. Non preoccuparsi se si visualizzano dei Warning come nel mio caso
Lanciare le seguenti righe di codice facendo un unico copia e incolla quindi INVIO
|
0
1
2
3
4
|
CREATE TABLE supermasters (
ip VARCHAR(25) NOT NULL,
nameserver VARCHAR(255) NOT NULL,
account VARCHAR(40) DEFAULT NULL
);
|
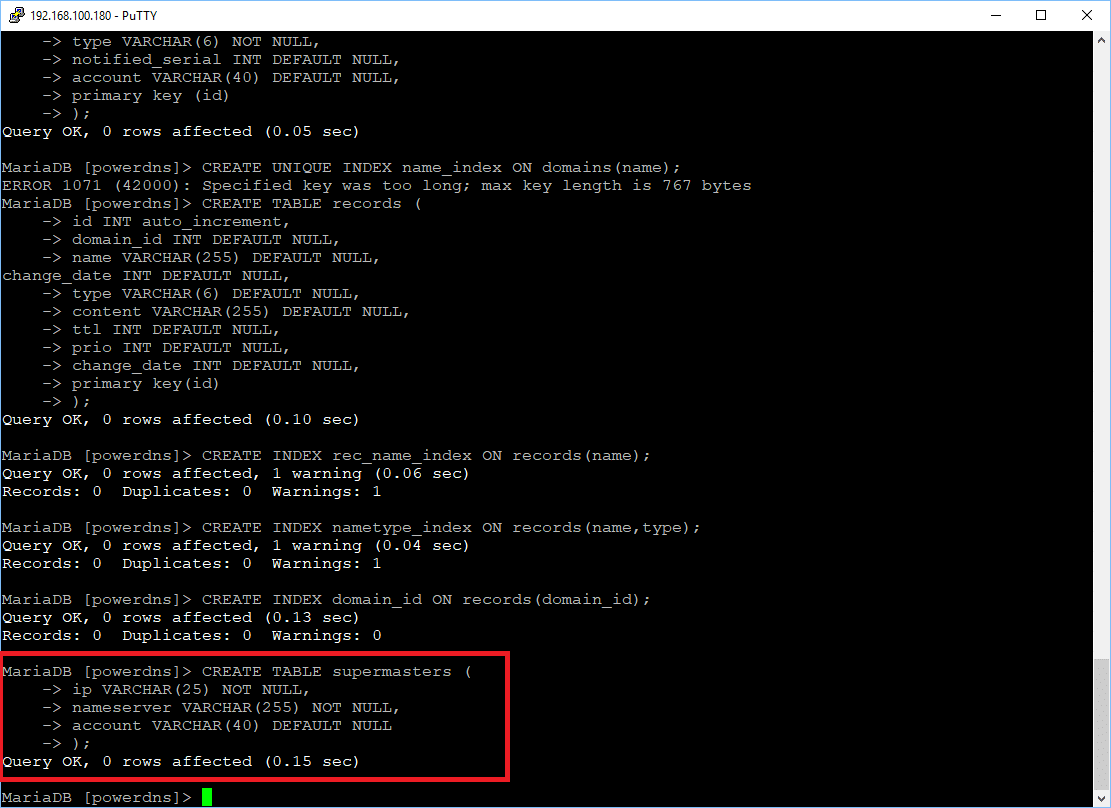
Se è tutto OK dovremmo vedere una schermata come quella sovrastante.
Quindi usciamo dal MySQL con il comando:
|
0 |
quit; |
CONFIGURAZIONE DI POWERDNS PER L’UTILIZZO DI MYSQL
Ora dobbiamo configurare PowerDNS in modo che utilizzi il backend MySQL.
Per prima cosa eliminiamo tutti i files di configurazione presenti con il comando:
|
0 |
sudo rm /etc/powerdns/pdns.d/*.*
|
Quindi creiamo il file di configurazione con il comando:
|
0 |
sudo nano /etc/powerdns/pdns.d/pdns.local.gmysql.conf
|
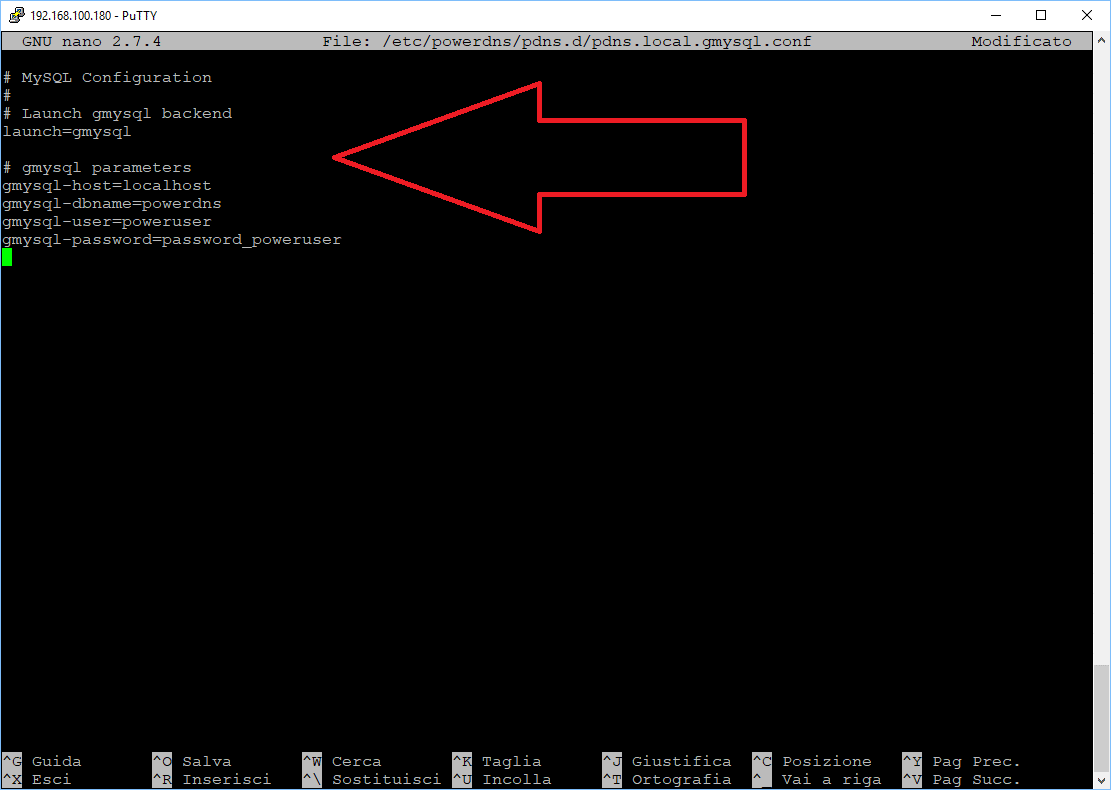
Aggiungere le seguente rigghe come mostrato nell’immagine sovrastante
|
0
1
2
3
4
5
6
7
8
9
|
# MySQL Configuration
#
# Launch gmysql backend
launch=gmysql
# gmysql parameters
gmysql-host=localhost
gmysql-dbname=powerdns
gmysql-user=poweruser
gmysql-password=password_poweruser
|
Salvare e chiudere il file di configurazione
Riavviamo quindi PowerDNS con il comando
|
0 |
sudo service pdns restart |
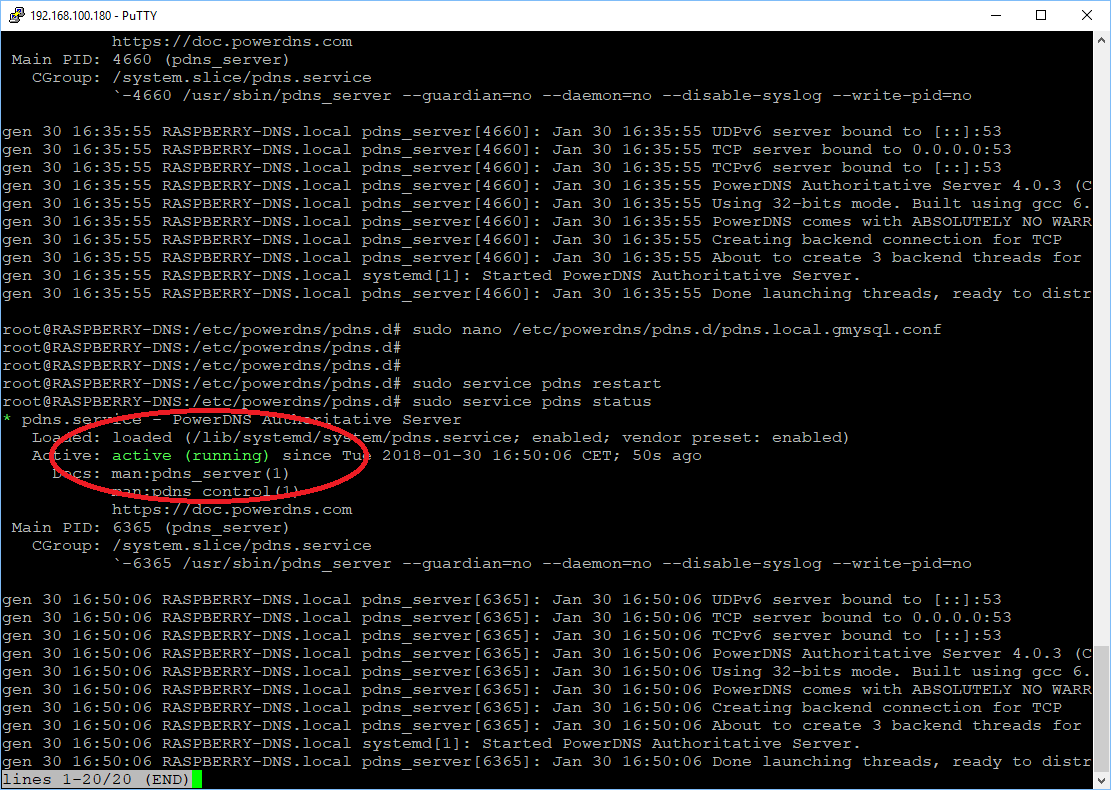
Se è tutto OK lanciando il comando seguqnte dovremmo vedere una schermata come nell’immagin sovrastante
|
0 |
sudo service pdns status
|
TEST DI POWERDNS
Editiamo il file /ect/resolv.conf con il comando:
|
0 |
sudo nano /etc/resolv.conf
|
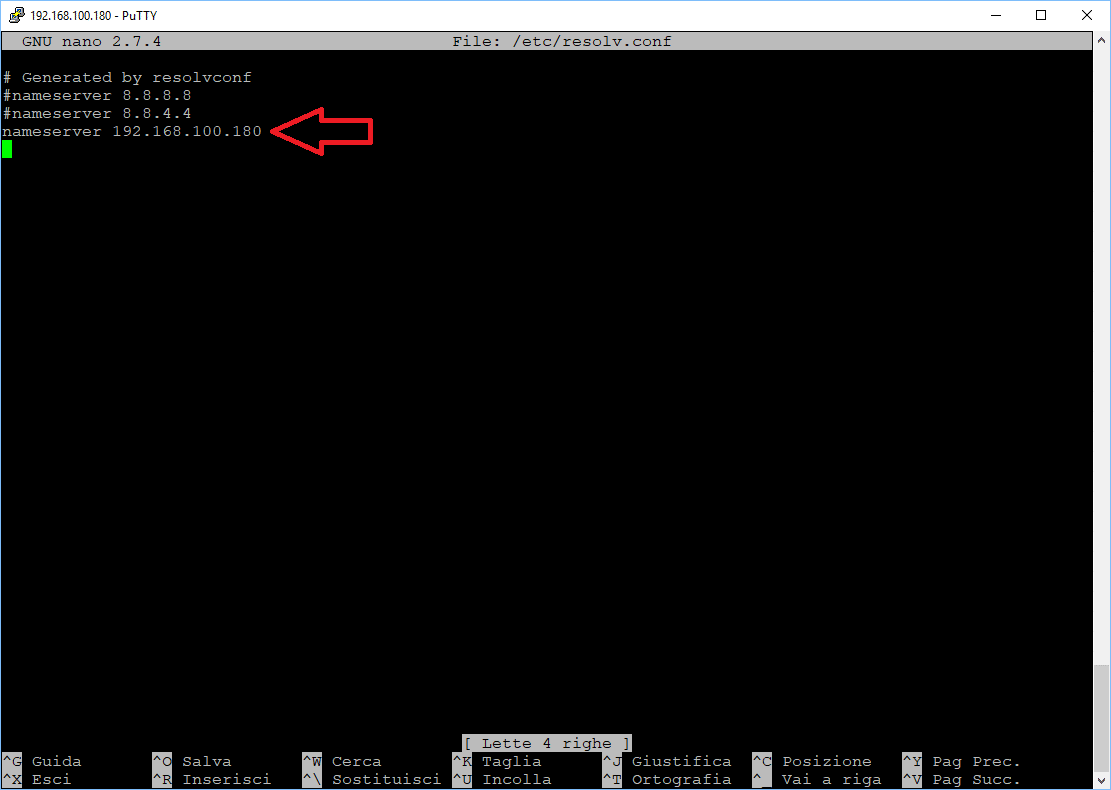
Commentare eventuali nameserver già presenti ed aggiungere il nameserver con l’IP del nostro Raspberry
Nel mio caso ho aggiunto la stringa
|
0 |
nameserver 192.168.100.180
|
Salvare e chiudere il file
Verifichiamo quindi che il demone di PowerDNS sia in ascolto con il comando:
|
0 |
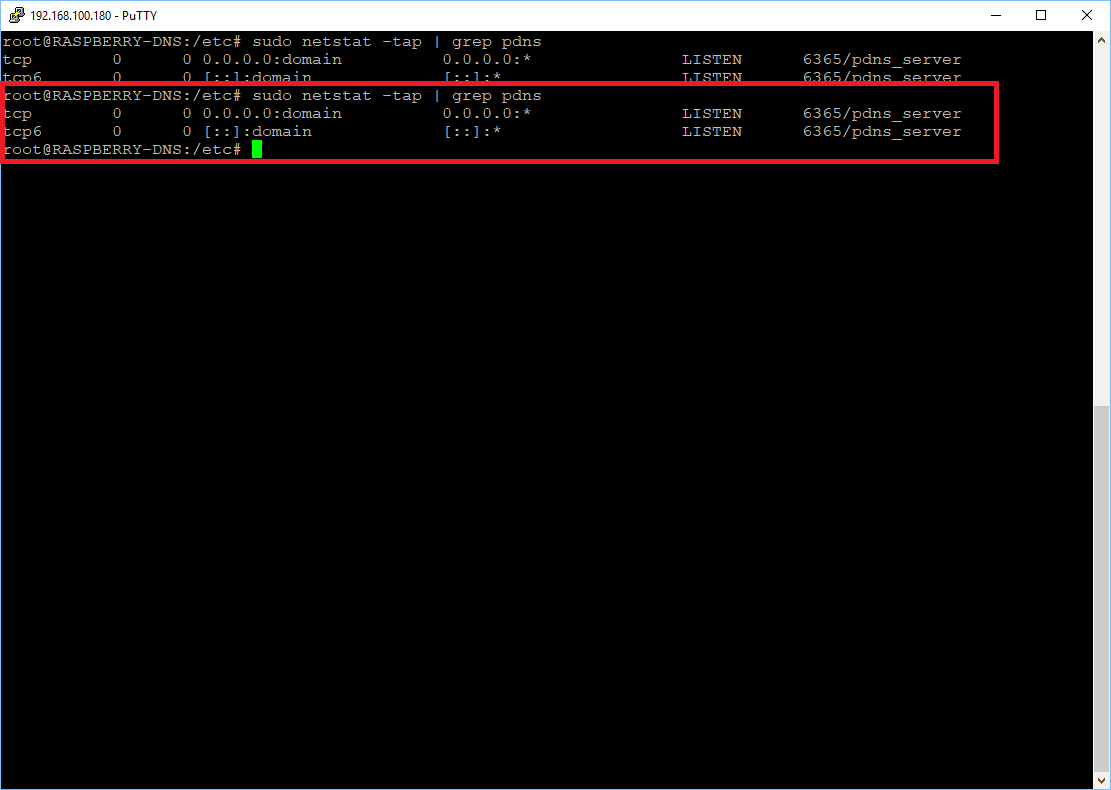
sudo netstat -tap | grep pdns
|
|
0
1
|
tcp 0 0 0.0.0.0:domain 0.0.0.0:* LISTEN 6365/pdns_server
tcp6 0 0 [::]:domain [::]:* LISTEN 6365/pdns_server
|
Se è tutto corretto dovremmo vedere il demone in ascolto come mostrato nell’immagine sovrastante
Adesso per verificare che PowerDNS funzioni lanciamo il seguente comando
|
0 |
sudo dig @127.0.0.1
|
oppure
|
0 |
sudo dig @localhost
|
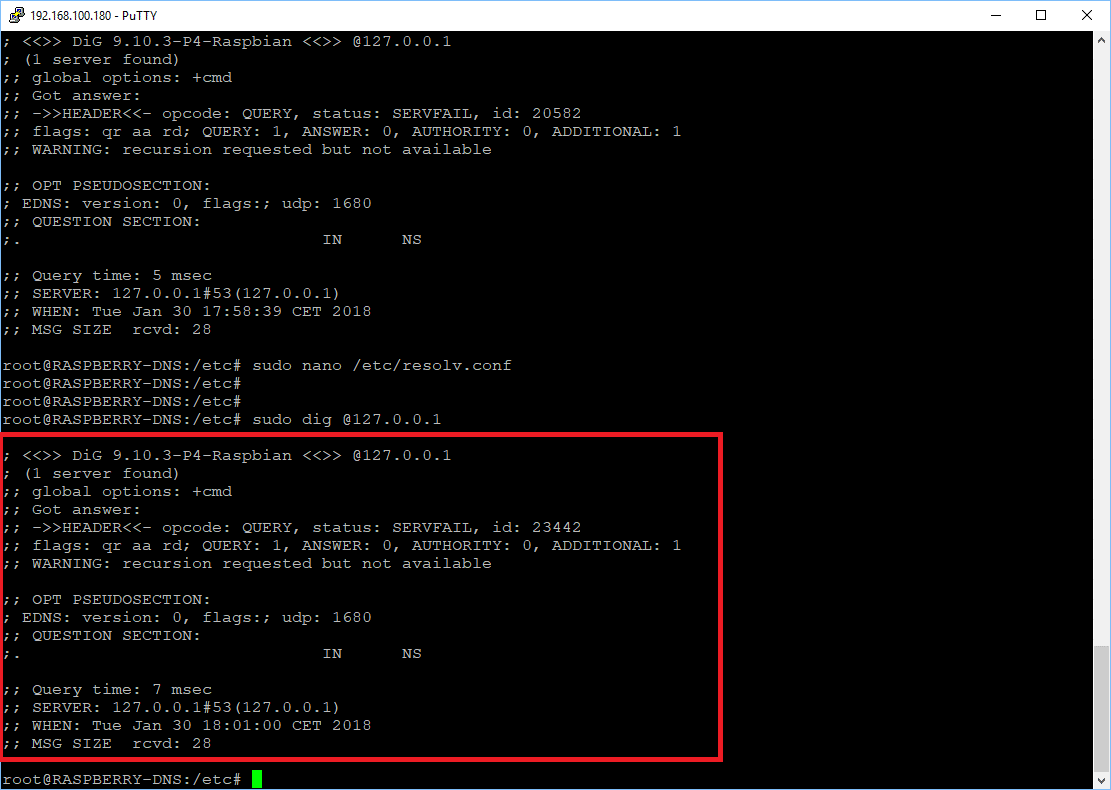
Se è tutto corretto dovremmo vedere le seguenti righe di output (vedi immagine sovrastante)
|
0
1
2
3
4
5
6
7
8
9
10
11
12
13
14
15
16
|
; <<>> DiG 9.10.3-P4-Raspbian <<>> @127.0.0.1
; (1 server found)
;; global options: +cmd
;; Got answer:
;; ->>HEADER<<- opcode: QUERY, status: NOERROR, id: 65075
;; flags: qr rd; QUERY: 1, ANSWER: 0, AUTHORITY: 0, ADDITIONAL: 1
;; WARNING: recursion requested but not available
;; OPT PSEUDOSECTION:
; EDNS: version: 0, flags:; udp: 2800
;; QUESTION SECTION:
;. IN NS
;; Query time: 4 msec
;; SERVER: 127.0.0.1#53(127.0.0.1)
;; WHEN: Mon Mar 30 14:38:58 IST 2015
;; MSG SIZE rcvd: 29
|
Proviamo a lanciare il seguente comando per verificare che PowerDNS funzioni anche con l’IP del Raspberry:
|
0 |
sudo dig @192.168.100.180
|
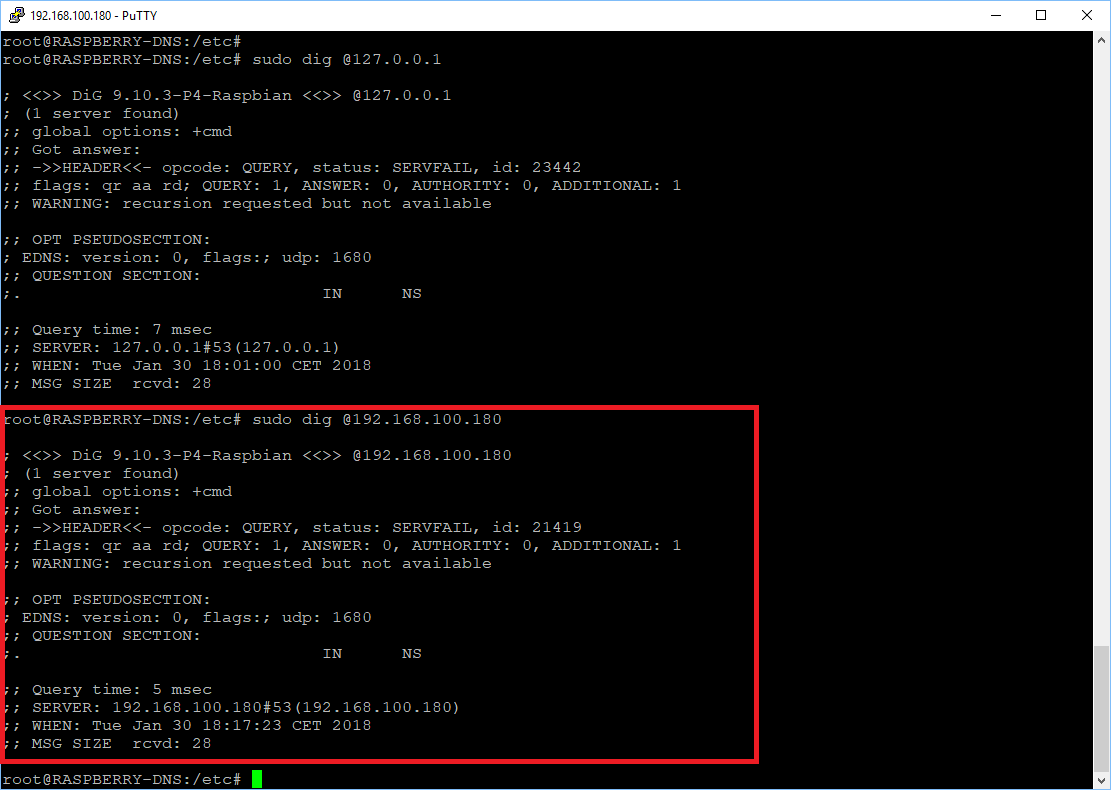
Se è tutto corretto dovremmo vedere le seguenti righe di output (vedi immagine sovrastante)
|
0
1
2
3
4
5
6
7
8
9
10
11
12
13
14
15
16
|
; <<>> DiG 9.10.3-P4-Raspbian <<>> @192.168.100.180
; (1 server found)
;; global options: +cmd
;; Got answer:
;; ->>HEADER<<- opcode: QUERY, status: SERVFAIL, id: 21419
;; flags: qr aa rd; QUERY: 1, ANSWER: 0, AUTHORITY: 0, ADDITIONAL: 1
;; WARNING: recursion requested but not available
;; OPT PSEUDOSECTION:
; EDNS: version: 0, flags:; udp: 1680
;; QUESTION SECTION:
;. IN NS
;; Query time: 5 msec
;; SERVER: 192.168.100.180#53(192.168.100.180)
;; WHEN: Tue Jan 30 18:17:23 CET 2018
;; MSG SIZE rcvd: 28
|
A questo punto possiamo procedere con la creazione delle nostre Zone DNS e all’aggiunta dei nostri Record DNS.


0 commenti